|
-
23rd October 23, 07:48 AM
#1
Advice on Repairing Pleats and Thread Question
I received my copy of 'The Art of Kiltmaking' and finally had a chance to read through much of it. I was hoping it would help with the repair of our well-worn marching band kilts, but (as I suspected might be the case) the instructions when stitching pleats can't be used on a finished kilt. Not without deconstructing far too much than is practical. So... The first couple kilts I repaired, I worked from hip to waist to repair the opened pleat. However, I couldn't use a straight up-and-down technique with the needle without going through all layers and the linings. This meant either taking larger stitches or catching only one or two threads, and it was nearly impossible to keep the stitches invisible. I ended up using an unorthodox method to fix one kilt, and could use some input on the technique. The stitches are invisible, but I'm not sure how secure they are for keeping the pleat in place.
Working from waist to hip (and starting the thread inside the open section of pleat so it was hidden), I came up through the bottom layer (the pleats are facing me as I work) exactly where the pleat will lay, then into the top layer (the pleat) where it's folded. I hope this makes sense so far. Instead of making the stitch along the fold, because you then can't get the needle at the right angle when sewing through the bottom layers again and the stitch ends up being to shallow or too long, I took the stitch at a 45 degree angle from the front/fold of the pleat about 1/16" inside the pleat. Then, folding the top edge of the pleat back a little, the needle goes down into the bottom layer - matching where it just exited the top, and comes out diagonally again, exactly where the pleat lays when finished. I can try to get a picture later, as I'm not sure how easy this is to follow.
As to thread... our kilts are from two different makers/companies. Both use a thread to stitch the pleats that is thicker than the typical polyester threads I use for general sewing. Is there a reason for this? When hand-sewing any part of a wedding dress that will have significant tension, I use a waxed silamide thread. If I am able to source that type of thread in colors other than ivory or white, would it be suitable for kilts? It's much stronger than the poly thread and is similar to what is used by furriers, but not as heavy.
-
-
23rd October 23, 09:16 AM
#2
It sure would help us, help you, if you could post a few photos of the kilts and the problems you are experiencing.
-
The Following 2 Users say 'Aye' to Steve Ashton For This Useful Post:
-
23rd October 23, 11:49 AM
#3
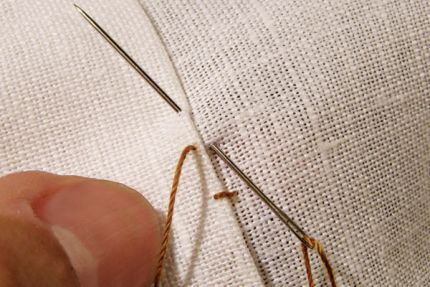
This first picture is not my work, but my repairs have been only slightly less visible when trying to sew through the fold and two layers underneath.
The problem I have is that working from hip up, if I dont want to sew through the lining and interfacing underneath, I have to have the needle at an angle. This means either catching only a thread or two of the first layer

Or catching both layers, but making too large (it seems to me, anyway) of a stitch.

Pictures of what I did instead coming up.
-
-
23rd October 23, 11:59 AM
#4
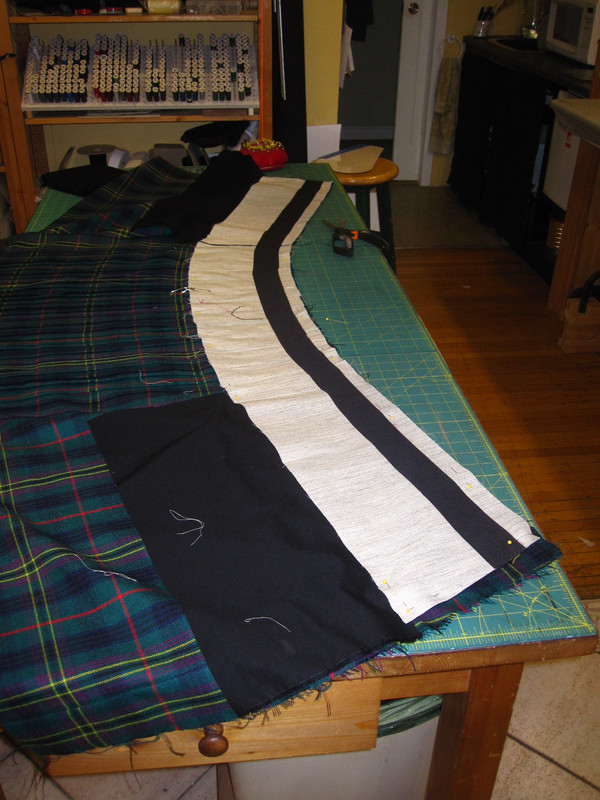
Working in the opposite direction, if I take the thread inside the pleat, I can take a bigger stitch and catch the layer underneath.

Then when I come through the top, I can get the stitches closer together.

I did this very quickly, and will be removing it, as this same pleat is coming undone at the top as well, but now I dont see the stitches. Im just not sure doing it this way is secure enough, though it seems better to catch both bottom layers than just the top, or to take longer stitches. Would love some input. (Some of the kilts were machine sewn through the entire kilt, so Im laughing at myself for stressing over it to this degree. But these kilts deserve better.)

-
-
24th October 23, 10:21 AM
#5
A silly/unconventional idea. What about a curved needle? Would that make fishing layers easier?
I ask, as a beginner in kiltmaking. Trying to get the picture myserlf.
And as to the tread. Would thick (cotton) tread be better, making less damage to the tartan? What about waxing it, like done with leatherworks?
As to the stitches, USAKilts had a recent video, with Barbara Tewksbury, where Rocky and Barb discussed stitching. Iirc they landed at minimum 8-10 stitches an inch.
Just some thoughts, if worth anything...
-
-
24th October 23, 12:27 PM
#6
I'm not sure that I would agree that the methods presented in "The Art of Kiltmaking", or TAoK for short, cannot be applied to repairs.
I have made many kilts from scratch and repaired many kilts. I use the same techniques and the same 4 stitches for both.
When stitching pleats by hand I do not push the needle into the fabric perpendicular to the edge of the pleat. I push the needle into the pleat perpendicular to where the thread from the last stitch came out of the fabric. The needle then passes through the fabric at an angle.
This does two things. The angle of the needle sets the size or length of the stitches and allow me to adjust and maintain the alignment of the Tartan elements.

This is called a Fell Stitch.
Last edited by Steve Ashton; 24th October 23 at 12:30 PM.
-
-
24th October 23, 12:34 PM
#7
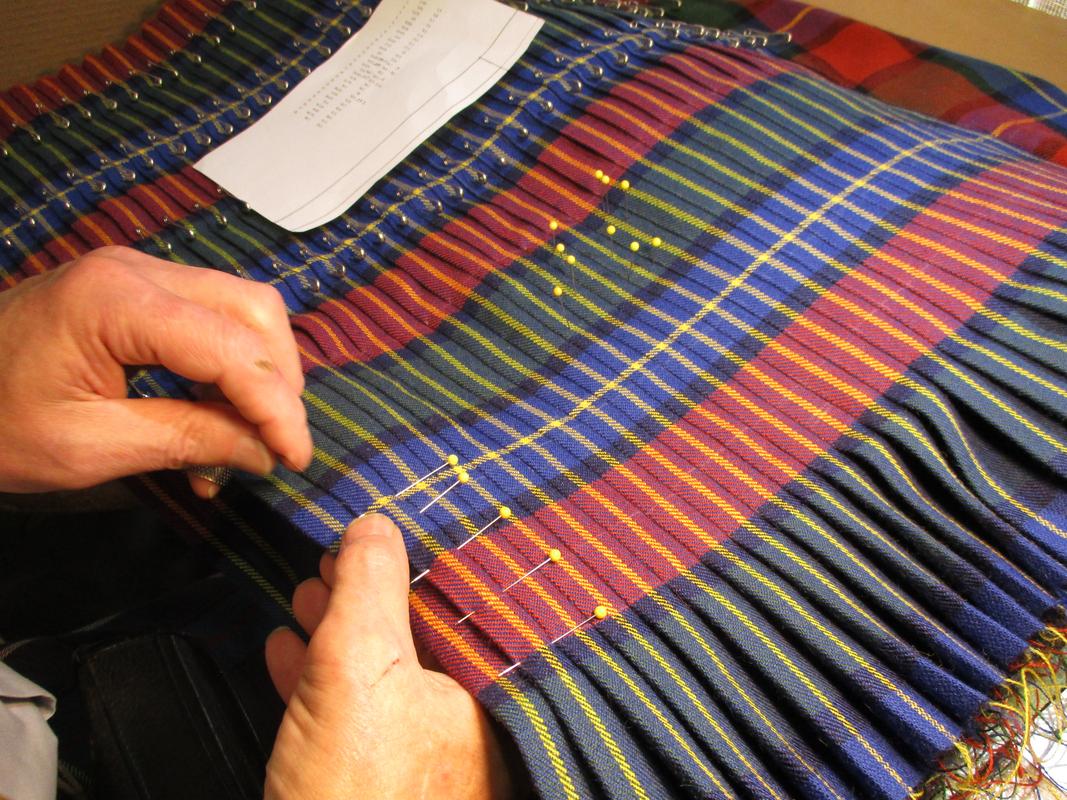
Now, I am predominantly Left-Handed so I do things a little differently than Barb does. I do not keep the kilt in my lap with the un-stitched fabric away from my body. I reverse this with the kilt laid on a table in front of me and the un-stitched fabric towards my body.
It is not the stitching of the pleats that give the strength to the kilt.
The internal interfacing and stabilizer are what give all the strength to the Garment.
The interfacing and stabilizer are stitched into the inside of the kilt using a pad stitch.
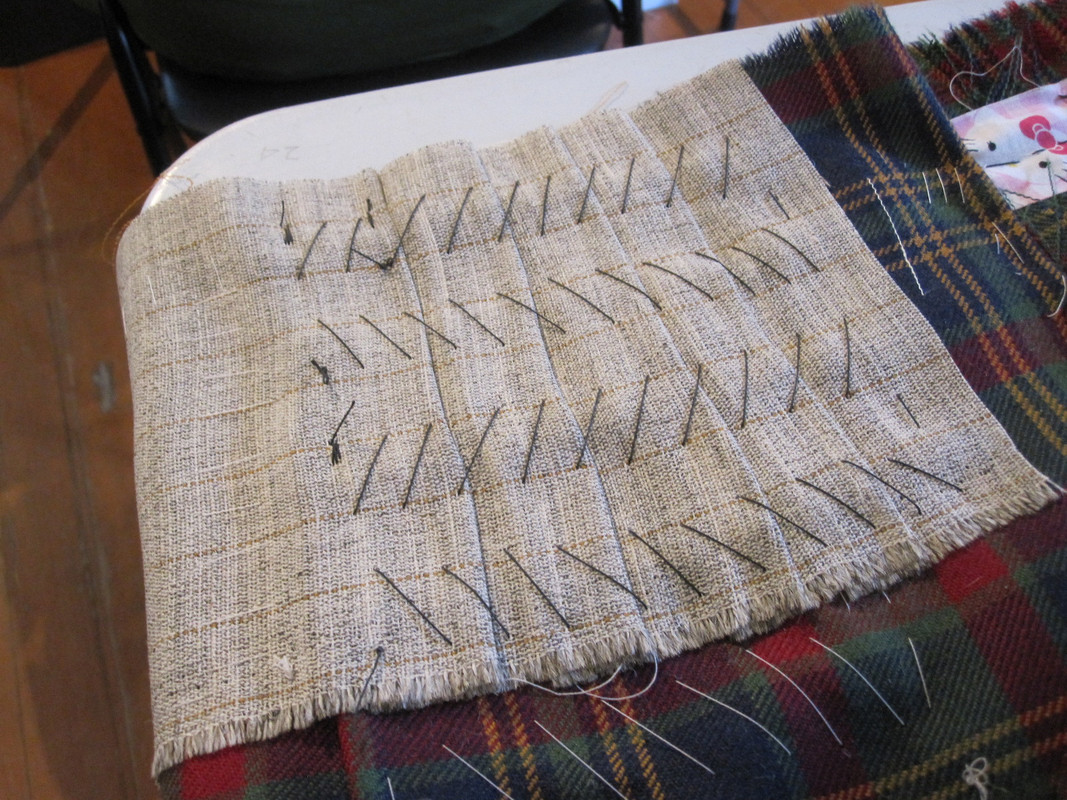
The pleat stitching does not go through the interfacing and the interfacing stitching does not go through to the outside of the kilt.
Last edited by Steve Ashton; 24th October 23 at 12:38 PM.
-
-
24th October 23, 12:45 PM
#8
I then do one other thing differently than Barb. I machine stitch my interfacing and stabilizer into one unified piece.
Then pad stitch that one piece into the kilt.
My interfacing and stabilizer also extend the entire width of the inside of the kilt.
But both methods work equally well.
-
-
24th October 23, 12:57 PM
#9
I use the same 100% Polyester Gutterman brand thread that Barb uses. It is thin so hides well is very strong and is available in a huge range of colors.
I have seen kilts sewn with a thicker thread. I have seen kilts sewn with Cotton thread. I have seen kilts sewn with Silimide thread. I have tried Silimide thread and it works very well but is not available in a wide enough color range for many Tartans and is much more expensive.
For my internal pad stitching I use Coats and Clark brand extra strong upholstery thread.
I do not use thick thread for pleat stitching and never use cotton thread for kilts.
-
-
24th October 23, 01:04 PM
#10
 Originally Posted by Steve Ashton

I'm not sure that I would agree that the methods presented in "The Art of Kiltmaking", or TAoK for short, cannot be applied to repairs.
I have made many kilts from scratch and repaired many kilts. I use the same techniques and the same 4 stitches for both.
When stitching pleats by hand I do not push the needle into the fabric perpendicular to the edge of the pleat. I push the needle into the pleat perpendicular to where the thread from the last stitch came out of the fabric. The needle then passes through the fabric at an angle.
This does two things. The angle of the needle sets the size or length of the stitches and allow me to adjust and maintain the alignment of the Tartan elements.
This is called a Fell Stitch.
Does it not matter that the fell stitch is only catching two layers of fabric - those visible in your first photo - since the stitches aren't, or shouldn't be, under tension? I don't seem to be able to catch the bottom (unseen) layer without taking a stitch that is 3/16" or more. The idea in the post above yours of using a curved suture needle is interesting, though having never sewn with one it would probably be too weird to me.
-
 Posting Permissions
- You may not post new threads
- You may not post replies
- You may not post attachments
- You may not edit your posts
-
Forum Rules
|
|


 Reply With Quote


Bookmarks