X Marks the Scot - An on-line community of kilt wearers.

   X Marks Partners - (Go to the Partners Dedicated Forums )
USA Kilts website Celtic Croft website Celtic Corner website Houston Kiltmakers

User Tag List

Results 1 to 9 of 9
  1. #1
    Join Date
    7th March 09
    Posts
    16
    Mentioned
    0 Post(s)
    Tagged
    0 Thread(s)

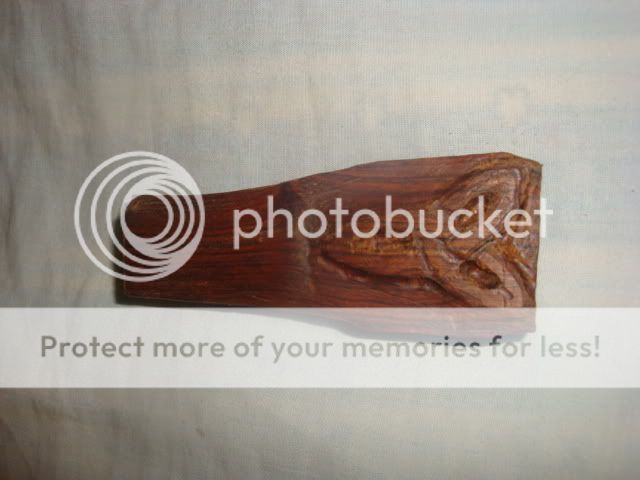
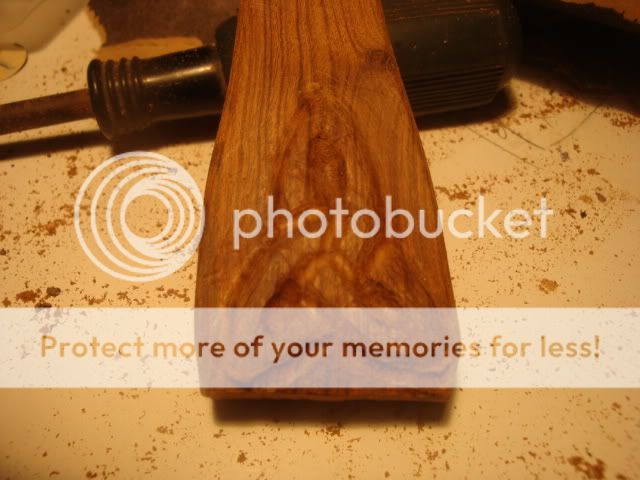
    Handle Experiements Follow Up - Carving a Celtic Knot

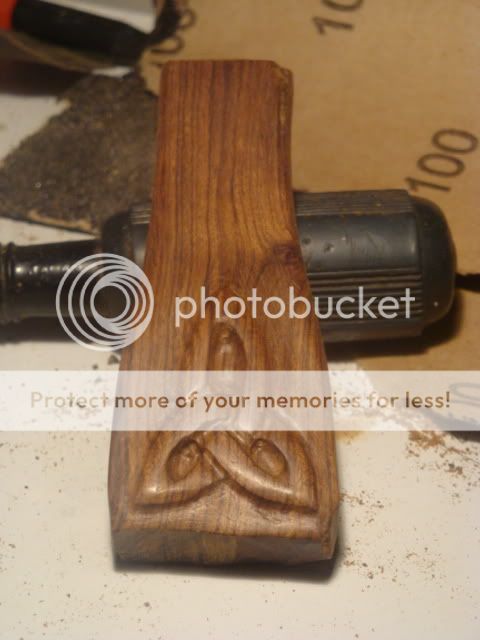
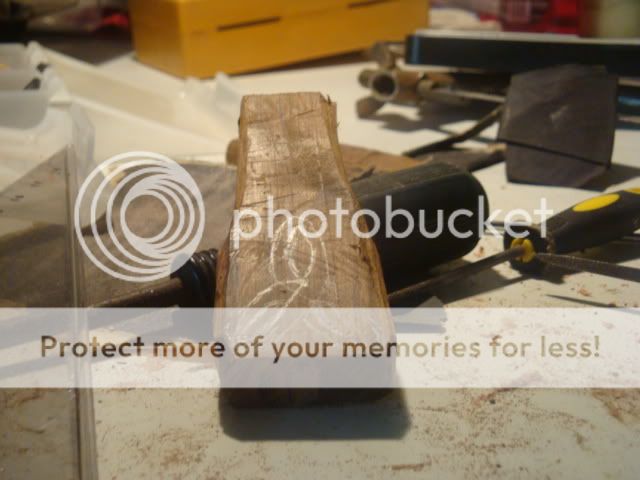
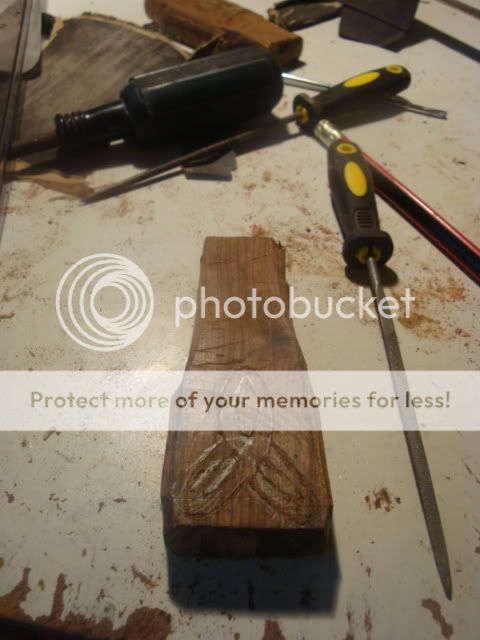
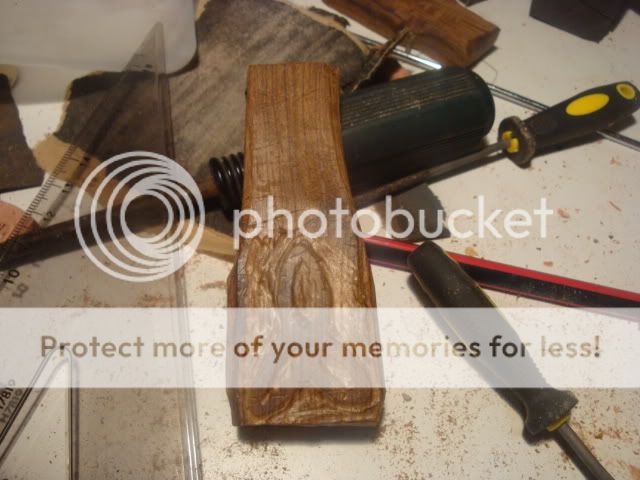
    This is a follow up to some of the question raised in the "Handle Experiments" thread - I recall pictures were asked for. For those more experienced in wood working please throw in your advice and constructive criticisms for the rest of us to learn from. I've kept the text to a minimum, as it follows on our discussions from the original "Handle experiments" thread.

    1) Rough mark out your shape on Blank - Note how it doesn't quite work to plan.


    2) Draw on your rough design


    3) Score out the design (For your engraving tool to follow)


    4) Start creating negative space (ie: "cut away everything that doesn't look like a bear")


    5) Carve out the knot overlaps


    6) Start sanding down the entire rest of the surface.


    7) Neaten your knot - This is the make or break part, it may take longer than every other step to get it just right, so don't rush it. Here you want to bevel the edges, smooth out the overlap areas and make sure the band stays roughly the same diameter throughout the knot.


    8) Finished knot - now you can finsih and neaten up the rest of the handle's proportions.

  2. #2
    Join Date
    28th May 08
    Location
    Trumansburg, NY
    Posts
    1,112
    Mentioned
    0 Post(s)
    Tagged
    0 Thread(s)
    That is turning out very nicely! Well done.
    I have always tempered my killing with respect for the game pursued. I see the animal not only as a target but as a living creature with more freedom than I will ever have. I take that life if I can, with regret as well as joy, and with the sure knowledge that nature's ways of fang and claw or exposure and starvation are a far crueler fate than I bestow. - Fred Bear

  3. #3
    Join Date
    2nd July 06
    Location
    Madison, Wisconsin
    Posts
    4,678
    Mentioned
    0 Post(s)
    Tagged
    0 Thread(s)
    Nice! It's amazing how you can go from having it look so rough to making it so polished at the end.

  4. #4
    Join Date
    19th February 08
    Location
    Seattle, WA: N 47° 40' 50.109";W 122° 17' 14.7726"
    Posts
    1,799
    Mentioned
    0 Post(s)
    Tagged
    0 Thread(s)
    Wow, I thought that it was going to look, well, not so great until the last slide!

    That turned out very nice, well done!
    The Barry

    "Confutatis maledictis, flammis acribus addictis;
    voca me cum benedictis." -"Dies Irae" (Day of Wrath)

  5. #5
    Join Date
    27th May 05
    Location
    Lexington KY
    Posts
    760
    Mentioned
    0 Post(s)
    Tagged
    0 Thread(s)
    I don't have the eye, or the patience, but I enjoy seeing someone else who does.
    Very nice

    David

  6. #6
    Join Date
    2nd October 07
    Location
    Denver, Colorado- a mile high, baby!
    Posts
    6,147
    Mentioned
    1 Post(s)
    Tagged
    0 Thread(s)
    I'm getting started on mine. I got the oak for it this weekend. That is very helpful- thank you!
    "Two things are infinite- the universe, and human stupidity; and I'm not sure about the universe." Albert Einstein.

  7. #7
    Join Date
    7th March 09
    Posts
    16
    Mentioned
    0 Post(s)
    Tagged
    0 Thread(s)
    Yup - that's why I think the photo's may help. If I had never done this before I may well have stopped and given up at around step 3, 4 or 5, when it looks truly awful. You just need to "embrace the ugliness" until the final sanding and neatening up phase.

    Let us know how your project turn out Nighthawk.

  8. #8
    Join Date
    10th March 09
    Location
    Fitzgerald, Georgia
    Posts
    371
    Mentioned
    0 Post(s)
    Tagged
    0 Thread(s)
    I have a thought that might make things easier. If anyone has a wood lathe, you can turn the handle to the desired profile. Leave the handle with extra material on so that you can make your carvings. Sand down one side flat so it will rest against your leg comfortably. I don't have a lathe or I would try it myself.

  9. #9
    Join Date
    2nd October 07
    Location
    Denver, Colorado- a mile high, baby!
    Posts
    6,147
    Mentioned
    1 Post(s)
    Tagged
    0 Thread(s)
    Quote Originally Posted by Thorin View Post
    Yup - that's why I think the photo's may help. If I had never done this before I may well have stopped and given up at around step 3, 4 or 5, when it looks truly awful. You just need to "embrace the ugliness" until the final sanding and neatening up phase.

    Let us know how your project turn out Nighthawk.
    I will do that. My chunk of peach wood is on it's way here this afternoon, my hatchet is sharp, and I have my decorative design in mind. I'll be starting soon!
    "Two things are infinite- the universe, and human stupidity; and I'm not sure about the universe." Albert Einstein.

Similar Threads

  1. Celtic Knot Tats
    By airforcedave72 in forum Miscellaneous Forum
    Replies: 12
    Last Post: 1st April 08, 02:50 PM
  2. Celtic Knot Sporran
    By A Hay in forum DIY Showroom
    Replies: 5
    Last Post: 19th November 07, 04:58 AM
  3. Wicked Celtic Knot work T-Shirts
    By Monkey@Arms in forum How to Accessorize your Kilt
    Replies: 9
    Last Post: 28th March 07, 11:12 AM
  4. Celtic Knot Kilt Belt
    By cavscout in forum How to Accessorize your Kilt
    Replies: 10
    Last Post: 17th October 06, 01:01 PM

Tags for this Thread

Bookmarks

Posting Permissions

  • You may not post new threads
  • You may not post replies
  • You may not post attachments
  • You may not edit your posts
  •  

» Log in

User Name:

Password:

Not a member yet?
Register Now!
Powered by vBadvanced CMPS v4.2.0