|
-
WIP Sporran #3 & #4 Rob Roys
Hi all,
I again promised myself that I'd shoot a few pix during the making of sporrans #3 and 4. I'm somewhat reluctant to log this process, as I'm trying to finish at least one of these for our local Highland games on Saturday. 
Both are Rob Roy styles again. Both are using the same leather as #1, which can be seen HERE.
I did make some pattern alterations for this series. I changed slightly the shape of the lid (although I didn't throw the original out, as I do like it).
The location of the cabochon is altered slightly for this set (downward toward the bag) and I'm planning a different shape as well for at least one of the two.
The gusset will be a little deeper on the newer one and slight increase in the overall bag size has been made as well.
Here are the cutting for the new pieces. Reinforcing panels have been cut, dyed and are glued to their facings.
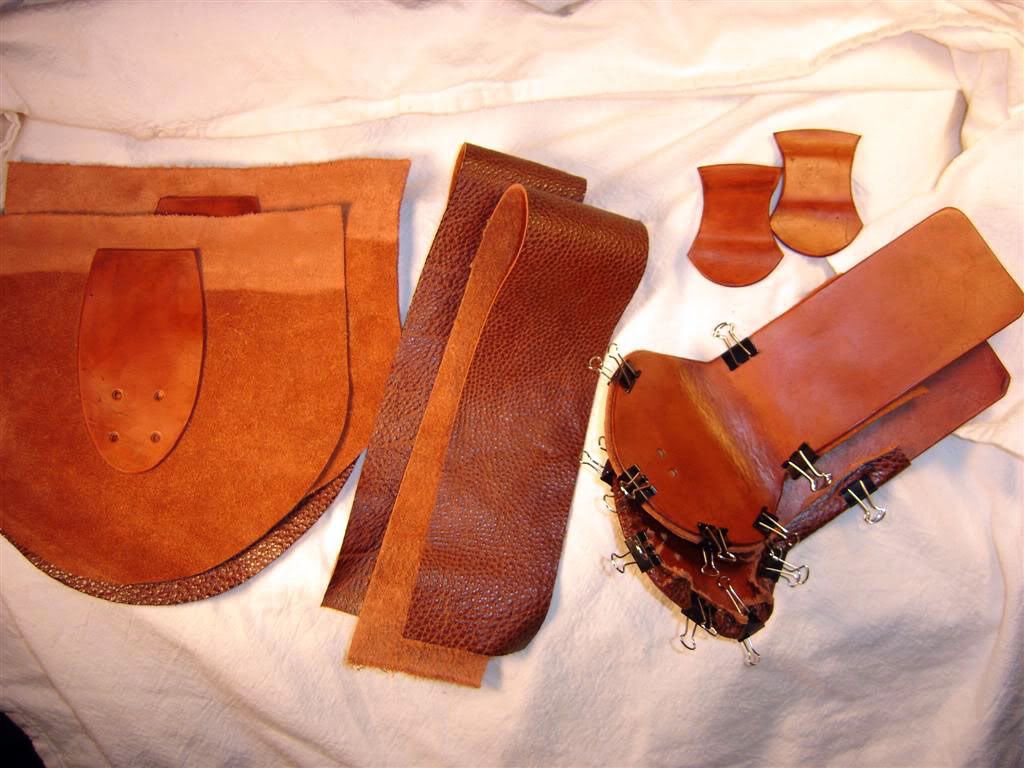
You can see that the top flaps are formed already. I do the shaping right after edging while the leather is still very wet and pliable. When the facings are glued on, they are glued with most of this shape maintained. They are then stretched on and clamped. This is important because if they were glued onto a flat flap it could cause extra stretching to the face panel in use.
Also of note, on the upper of the two flaps you'll see there is no leather to fully wrap the edge. Once the glue has fully set I will be lacing this edge. I really liked the effect on #2 - seen HERE, and will be doing a similar treatment with a slightly smaller braid (and obviously in a complimentary brown rather than black  ) )
Last night in the shop while I was waiting for the glues to fully set I broke out the table saw and lathe again. After some wood selection and a bit of work we have the toggles for one of the new lot, as well as a slab cut for the cabochon. The wood is Ebony Macassar.
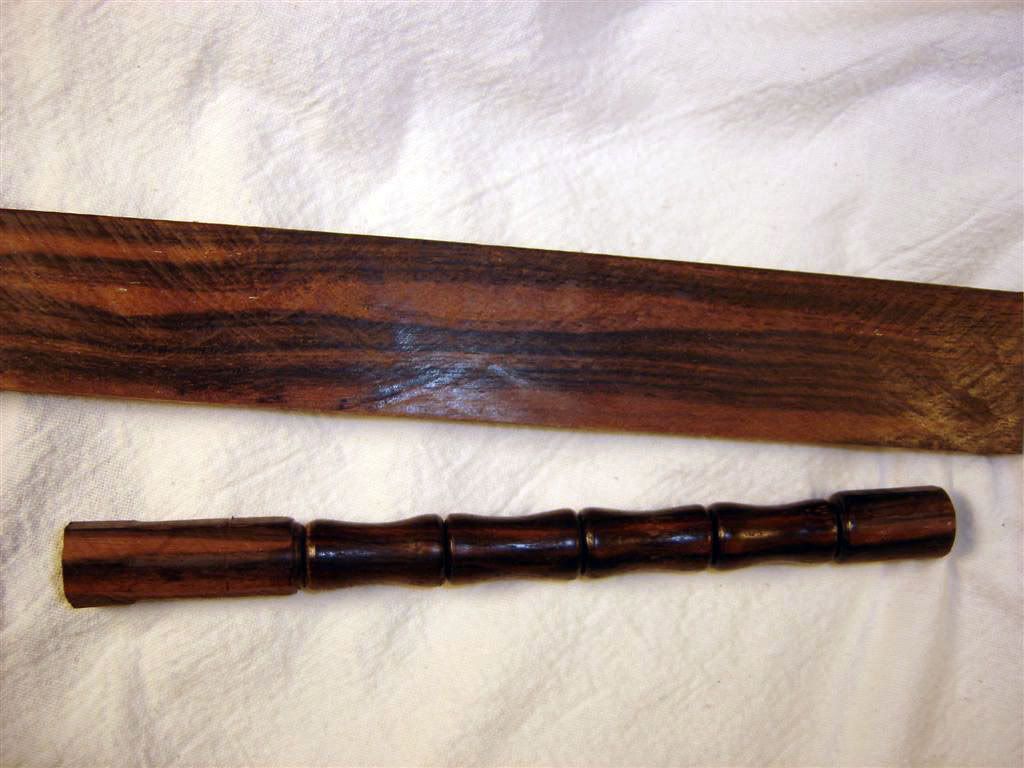
This set of toggles is a slightly different shape than on #1 and are a bit smaller.
They are just waiting to be cut from their mates, have their edges finished and be drilled for the thong.
As always, constructive critique and general commentary are welcome.
Thanks for looking - hopefully I'll have some updates this evening.
***BTW I'm hoping to fully document #5 (jacobite) from pattern design through completion. But that won't begin until these are finished (and hopefully out the door)
Last edited by artificer; 3rd June 10 at 05:55 AM.
Reason: speelin mitsakes
-
-
Looking good so far! Can't wait to see the outcome!
May The Force Be With You!
-Justin
-
-
I haven't been commenting, but I've been watching and I love your work, artificer. Looks like another fine project in the making.
-
-
Thank you both. Here are a few updates from yesterday early evening.
The bag that has officially been designated #3 - panels attached to faces and awaiting the gusset.
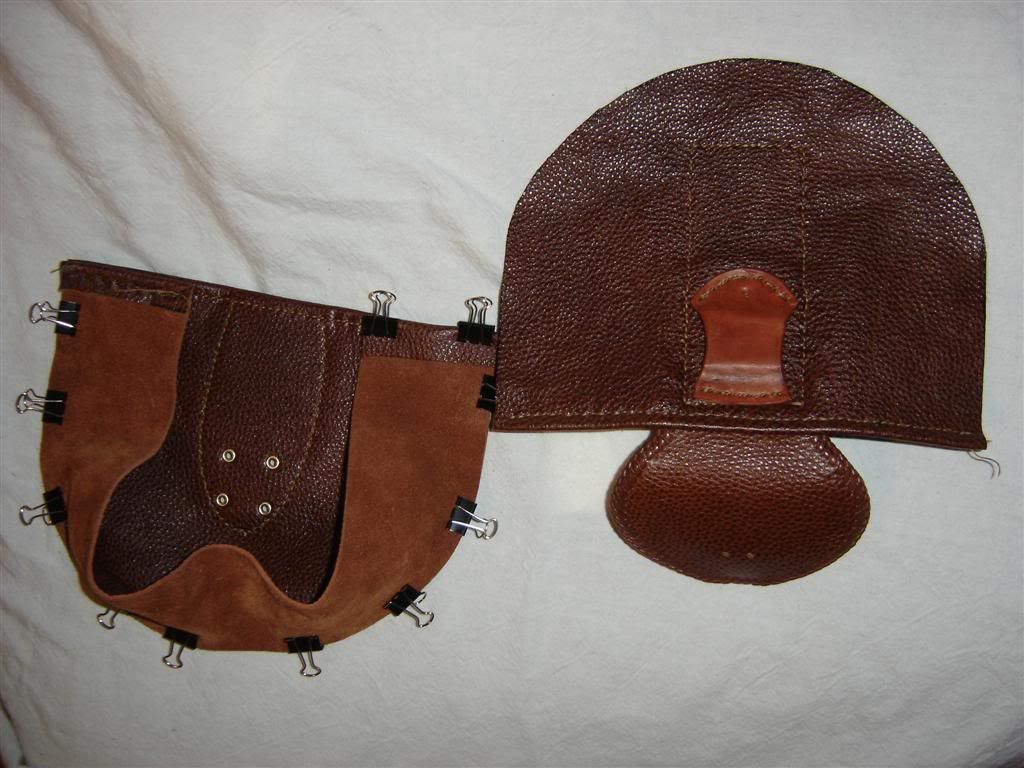
You can see that the top flap for #3 IS the one with the laced edge. Here's a detail shot.
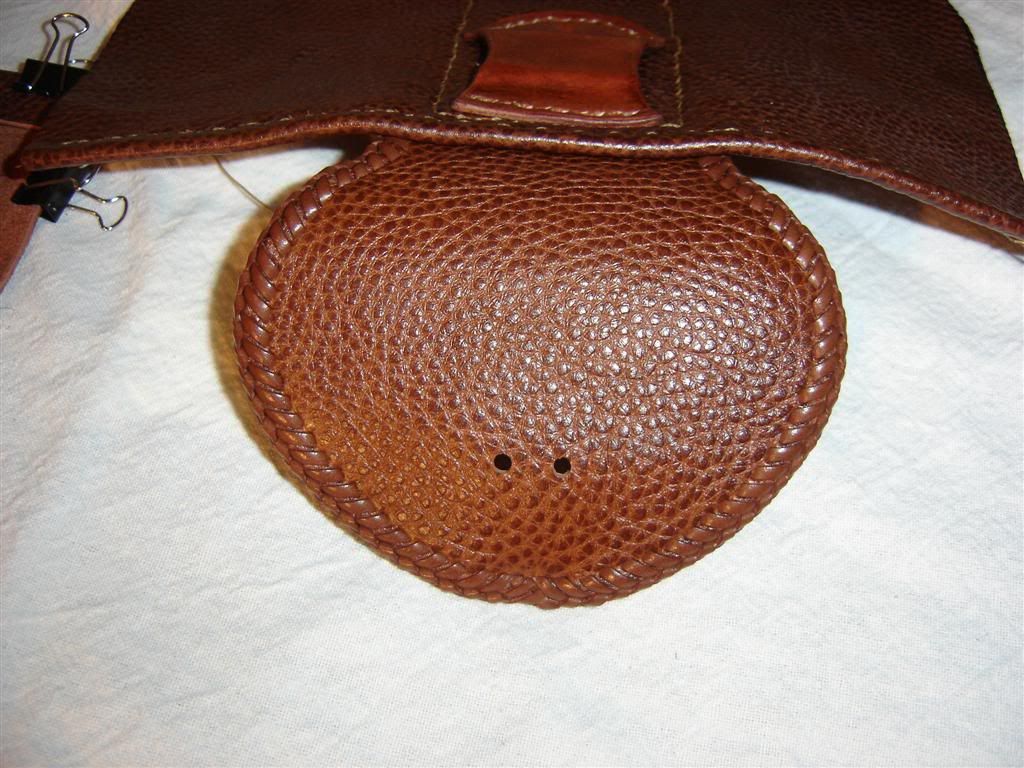
I really like the laced edge. It does add a lot of time over the sewn leather edge, but I think the effect is quite nice. This has been laced in the same way as #2, with the flap in halves so the lace travels down toward the center from both sides. This also adds a bit of time, but I think it's time well spent.
Anybody have any thoughts on the laced edge? Too structured for a 'casual' bag?
I love the feel of the laced edge, and #4 may end up with the same treatment.
-
-
 Originally Posted by artificer

Anybody have any thoughts on the laced edge? Too structured for a 'casual' bag?
I'm a relatively new initiate to kilts and accessories; but IMHO, the laced edge takes it that step above the "mass produced" look. The little details are what give it that true hand made one of a kind appeal. I only wish I had the skills (and confidence) to do that kind of workmanship. And a hint of #5 yet to come has me waiting impatiently to see more of your work.
-
-
Originally Posted by tinksdad
the laced edge takes it that step above the "mass produced" look. The little details are what give it that true hand made one of a kind appeal.
I agree, beautiful work.
-
-
Very nice colors, complementing each other.
-
-
a suggestion
The only thing I might suggest is that you may get a very clean look if you were to countersink the beads and hide the knots on the end. That may be something you would like to try. It is only a suggestion. I am really impressed with your workmanship! Having been a crafts instructor for twelve years (in leatherwork, woodcarving, metalwork, and many other crafts) it is nice to see truly high quality work!
-
-
Originally Posted by Downunder Kilt
Finnished sporran looks great, those wood toggles blend, yet enhance the colour of the leather. I am really looking forward to seeing project of the hunting sporran. If it is of the same quality that you have exhibited so far, I for one would be extremely interested in adding to my sporran collection.
Once again thanks for the pics
Thanks again! I probably won't be documenting further progress on #4 unless I do something different with it (who wants to see the same thing over and over?). I may shortly start a running documentary on #5, which WILL most likely be the hunting sporran based on how my earliest sketches are coming. I think the Jacobite is going to need a LOT more tweaking before I get to trial pattern cuts. I may start the pix with sketches, which is truly the start of the process, so keep an eye peeled.
Also, what colour does any/everyone want to see the hunter go in? Black or brown (which is they way I'd naturally lean).
Originally Posted by BLHS209
Very nice colors, complementing each other.
Thank you!
Originally Posted by Harold Cannon
The only thing I might suggest is that you may get a very clean look if you were to countersink the beads and hide the knots on the end. That may be something you would like to try. It is only a suggestion. I am really impressed with your workmanship! Having been a crafts instructor for twelve years (in leatherwork, woodcarving, metalwork, and many other crafts) it is nice to see truly high quality work!
Thank you for the very kind words and suggestion. I've thought about countersinking for a recessed knot. I haven't done it though, as I do like the Capuchin knot, and if I go to a finer 'cord' (possibly braided) I think the knot might look very smart. I'm still very on the fence, though, and may yet end up recessing the knots on this and any future bags.
-
-
7th June 10, 04:54 PM
#10
great work. I vote for brown on the hunting sporran
-
Similar Threads
-
By bricelythgoe in forum DIY Showroom
Replies: 25
Last Post: 2nd December 09, 04:24 AM
-
By Bart_In_A_Kilt in forum DIY Showroom
Replies: 14
Last Post: 9th March 09, 10:17 AM
-
By Ancienne Alliance in forum Kilt Advice
Replies: 36
Last Post: 7th December 08, 11:16 AM
-
By Giraffe in forum Kilt Advice
Replies: 56
Last Post: 27th March 08, 07:39 PM
-
By phil h in forum How to Accessorize your Kilt
Replies: 16
Last Post: 12th December 04, 10:51 AM
 Posting Permissions
- You may not post new threads
- You may not post replies
- You may not post attachments
- You may not edit your posts
-
Forum Rules
|
|


Bookmarks