I've had some time to work on Tobus's kilt today so here is the continuation of this thread -------
The next step is to install the interfacing.
Most kilt makers today use what is called 'Hair Canvas". This is a woven fabric that is stiffer in one direction than the other. It is also dimensionally stable which means that along the grain this fabric does not stretch. This fabric helps support the back of the kilt giving it shape.
But the most important reason for the interfacing is to take the stresses of strapping the kilt on without transferring those stresses to the Tartan fabric or the stitching.
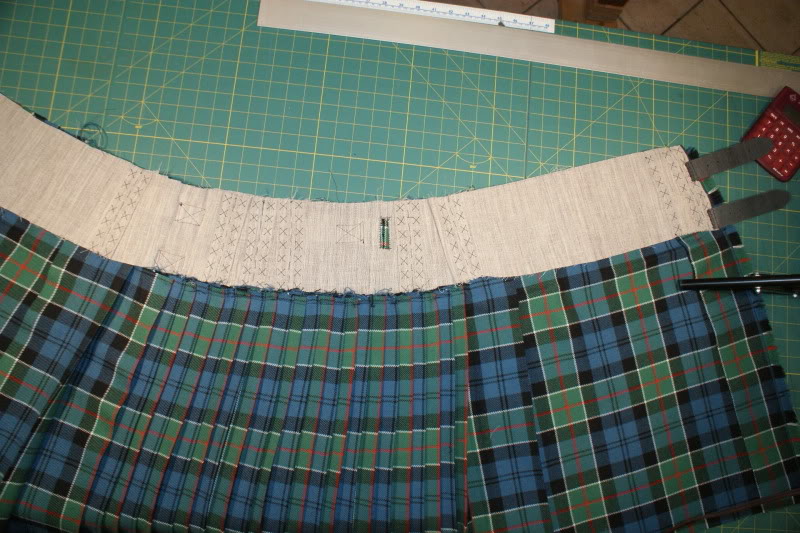
Where the stabilizer stretches across the back of the kilt from buckle to buckle, the interfacing spans the entire length of the kilt including both aprons.
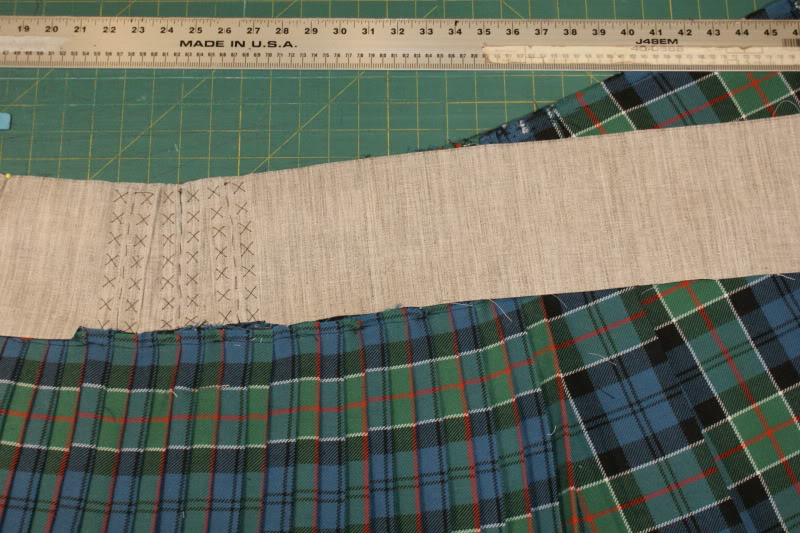
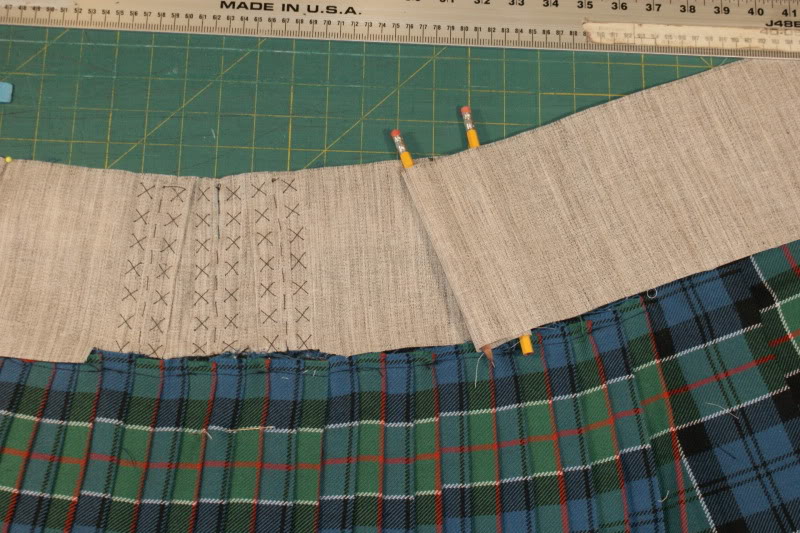
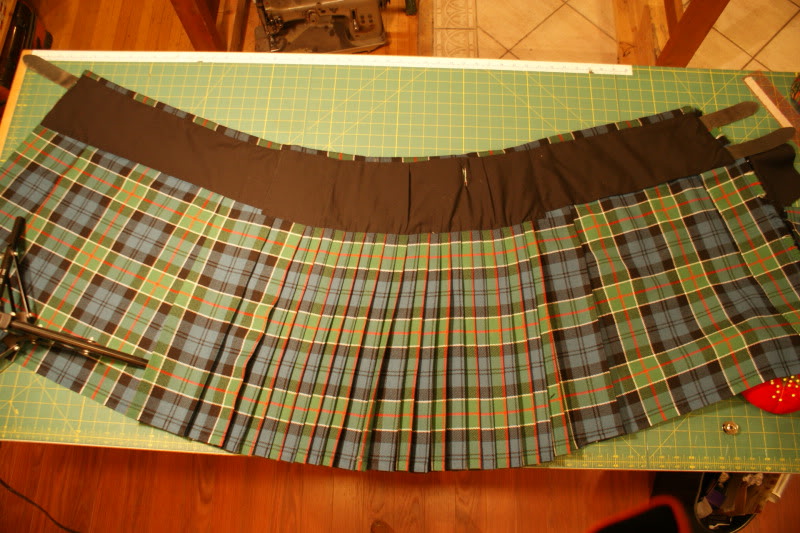
There is a problem though. In this photo you can see that when laid out, because the Fell is tapered, the kilt forms a curve. If you cut the interfacing in a matching curve you will loose the strength and resistance to stretch. You must fold darts into the fabric forming it to the curve of the kilt.
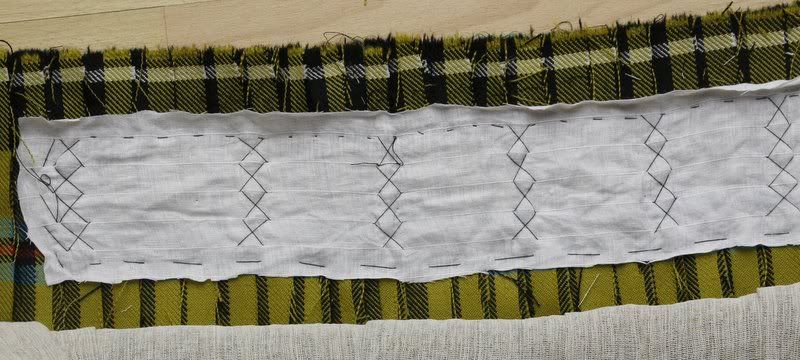
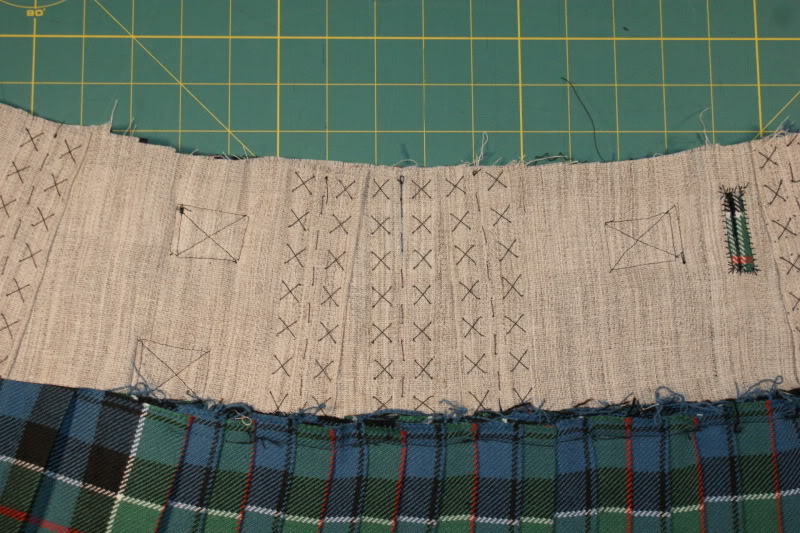
Everywhere the interfacing fabric is folded must be sewn down. As you saw from the before photos, if the folds of fabric are not sewn, they will open like an accordion defeating the whole reason that the interfacing is there.
Here is how I sew the folds of interfacing. Again, I am using a contrasting black thread so it is easier to see in these photos.
And yes, as others have pointed out, there are many ways to stitch the interfacing. Mine is my way. It is no better or worse than another kiltmaker as long as the fabric conforms to the shape of the kilt and will not stretch. When the kilt is worn the interfacing should act like one long piece of strong fabric.
__________________
Last edited by Steve Ashton; 4th July 19 at 10:59 AM.
Steve Ashton www.freedomkilts.com Skype (webcam enabled) thewizardofbc
I wear the kilt because: Swish + Swagger = Swoon.
My goal with this project is not to make a new kilt or alter this kilt in any way to turn it into a Freedom Kilt. My only job was to evaluate if anything was wrong with it and if so correct it if I could.
I would like this kilt to look exactly as it did from the outside as when it was bought.
But there is one thing that I am going to have to change.
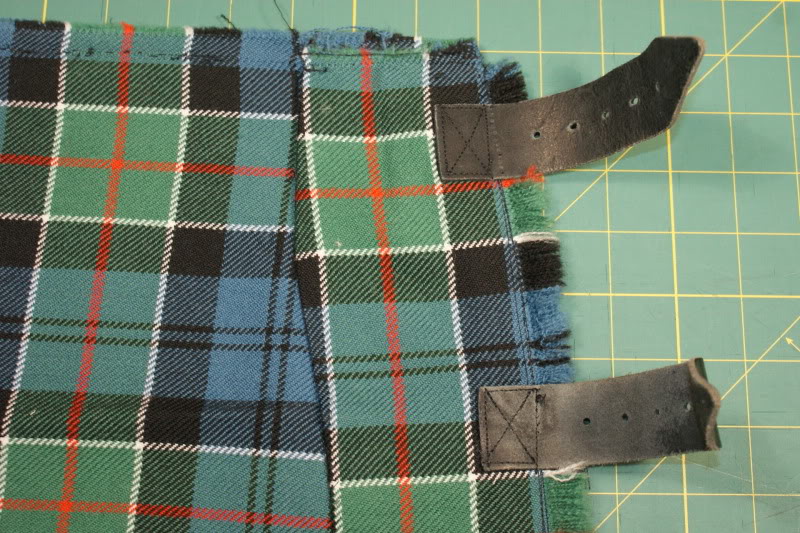
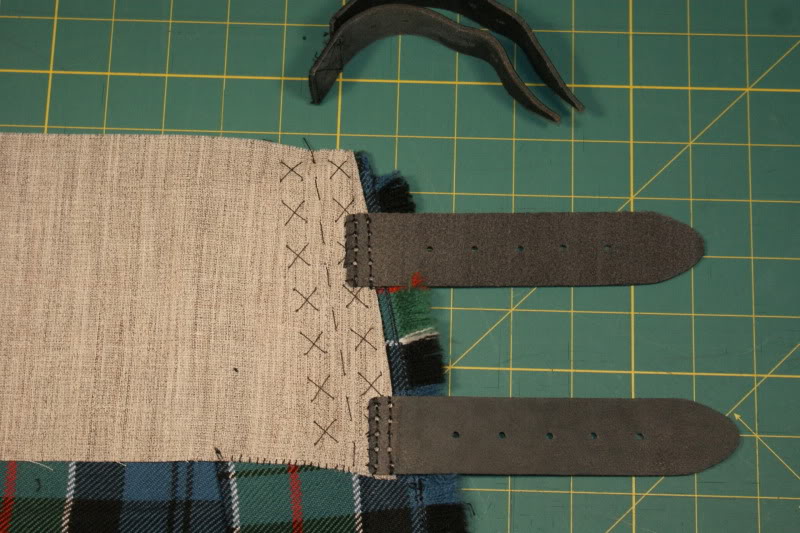
In this photo you can see the outer apron straps. They are machine sewn to the apron edge. But they were not sewn to the interfacing.
If I were to remove these and sew them back onto the kilt it would significantly weaken the straps themselves. You can only put so many holes in something without weakening it.
I have decided to replace the straps.
In this photo you can see the new straps sewn on. Note that they are sewn through the interfacing and the fold back of the apron but not all the way through to the outside.
I also aligned the straps to go straight across the apron and not with the tapered apron edge.
Our other kiltmakers will also notice that I did not tuck the interfacing under the folded back facing of the apron. This was done to better show you that straps must be sewn to the interfacing and not the apron itself. This was the cause of the distorted fabric we saw during the evaluation of this kilt.
Last edited by Steve Ashton; 8th October 18 at 01:05 PM.
Steve Ashton www.freedomkilts.com Skype (webcam enabled) thewizardofbc
I wear the kilt because: Swish + Swagger = Swoon.
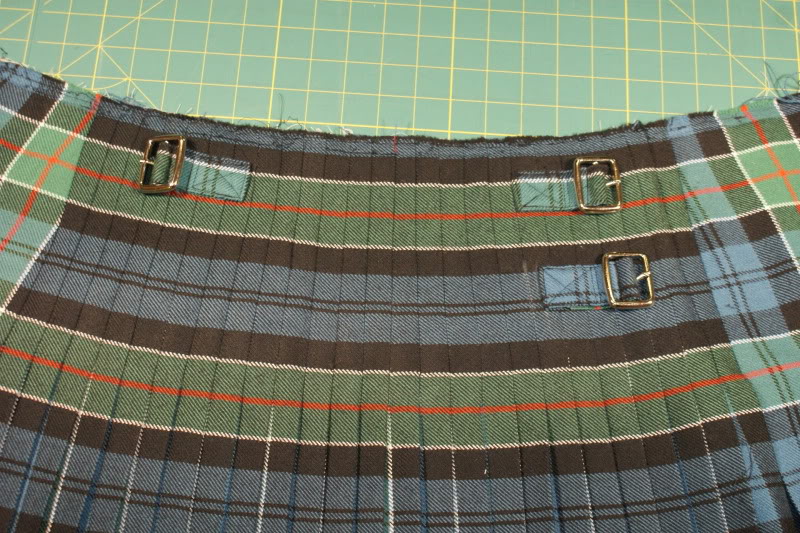
This afternoon I had some time to work on this kilt again. The interfacing is now fully installed and the buckles are sewn back on.
here is a detail shot showing how the buckles are sewn to the kilt completely through the stabilizer and interfacing.
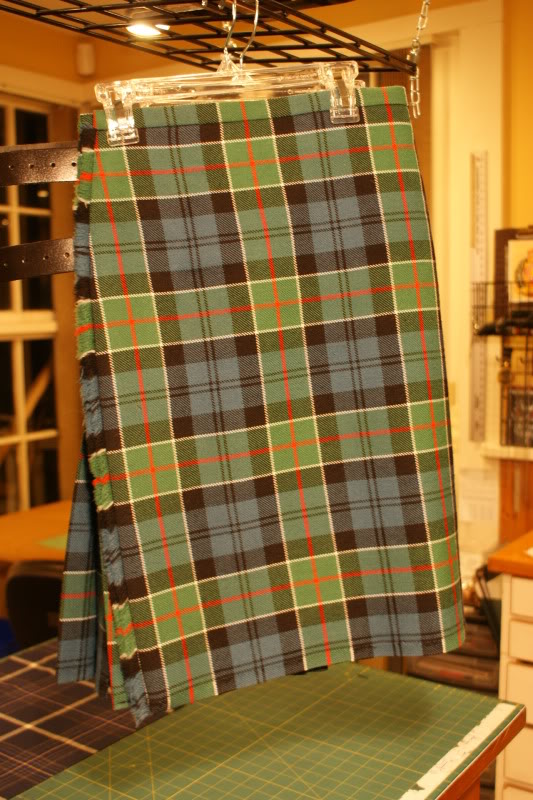
And here is the back of the kilt with the buckles in place.
As this kilt was originally machine sewn I did not feel it would be out of place to machine sew the buckles back on.
To finish this kilt up all I need to do now is put the waistband back on and sew the lining on to cover all this work.
Last edited by Steve Ashton; 4th July 19 at 11:05 AM.
Steve Ashton www.freedomkilts.com Skype (webcam enabled) thewizardofbc
I wear the kilt because: Swish + Swagger = Swoon.
Tobus has been very patient though this entire re-build process. He only bugged me 83 times about his kilt.
So I thought that as the kilt has been finished for a while now I should finish this thread.
I can then get in in a box and get his kilt back to him.
One of the final steps is putting the Lining back in the kilt.
Then there were a few small things that needed to finish up this project.
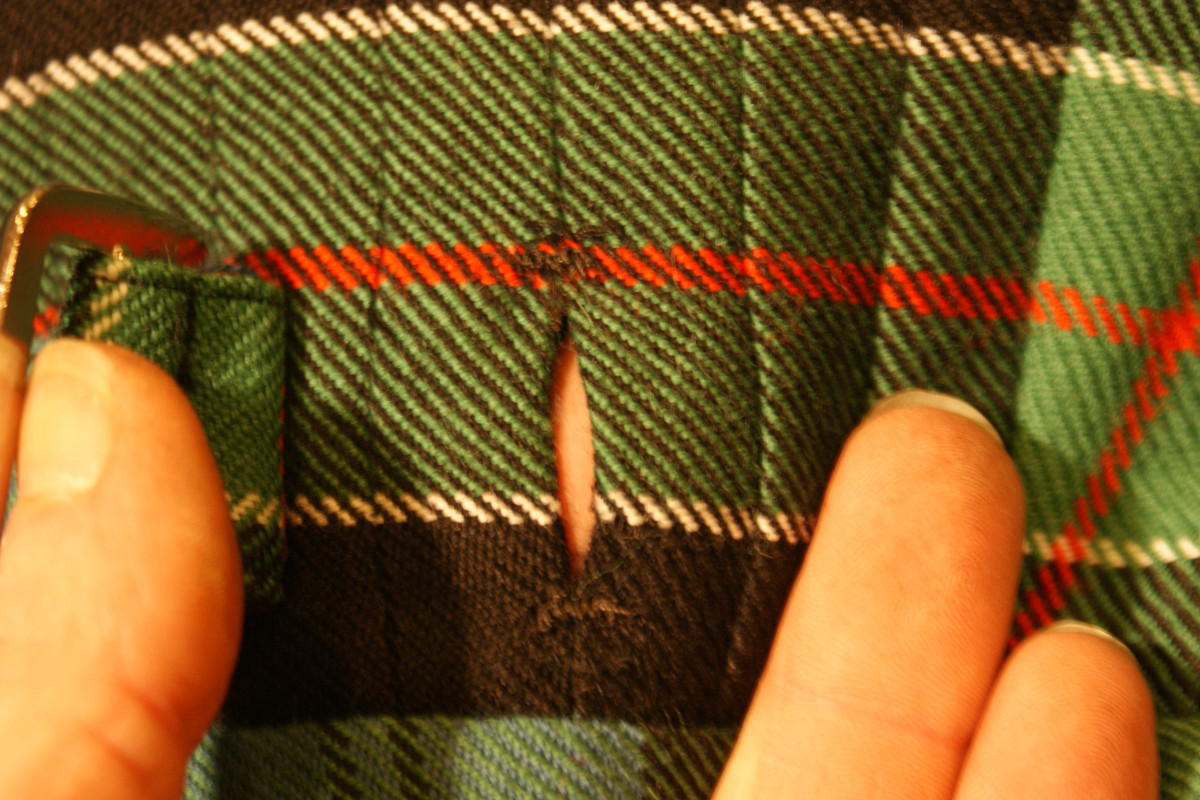
I did a good re-enforcing job on the strap hole.
And then a quick press touch up.
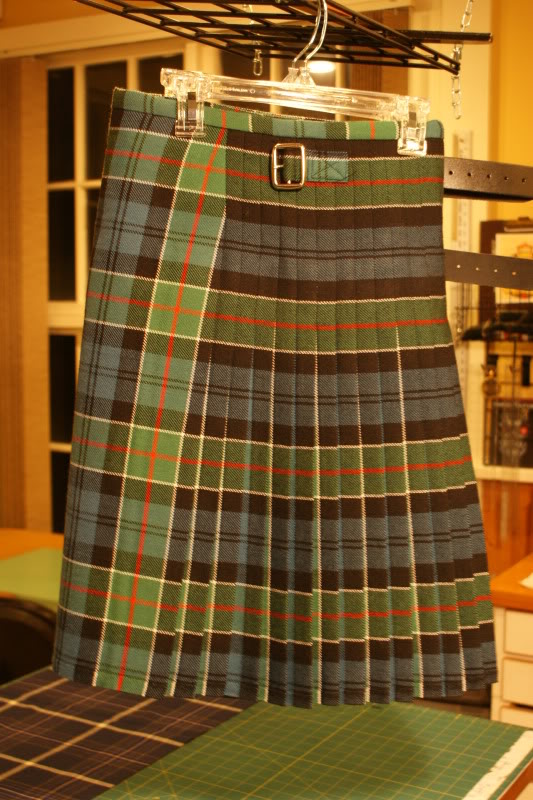
Here is the kilt just before it went into the shipping box.
All in all, this project took 18 man-hours not including the time for photos and posting.
This time also included the removal of two pleats which I did not include in the photos as it was something based on the measurement Tobus sent me but was not part of the rebuild job.
Tobus, I'm sorry, you still don't have a full hand-sewn tank. But the fabric is first rate and this kilt should now fit the way you expect and last you a good long time. I hope you like it.
Last edited by Steve Ashton; 4th July 19 at 11:09 AM.
Steve Ashton www.freedomkilts.com Skype (webcam enabled) thewizardofbc
I wear the kilt because: Swish + Swagger = Swoon.


Originally Posted by Emmet


Bookmarks