|
-
OK, now for the how-to: the knotwork didn't happen as the hilt is still a fair way from finished, but it seemed a perfect opportunity to etch the Mackenzie sgian I posted in an earlier thread.
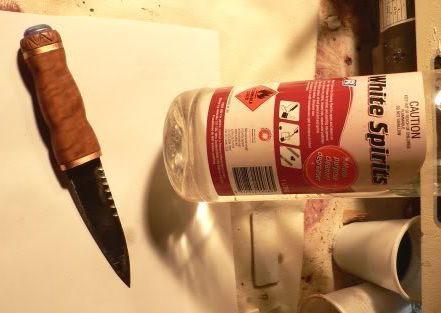
The first step is to clean& degrease the blade thoroughly. I used white spirit for this.
Next is to create the design on the blade using one of a number of different methods. For the "damascus" I use an acid resist pen only. These are used for drawing out circuit boards onto the copper, and are obtainable from radio shack or similar stores, along with the ferric chloride.
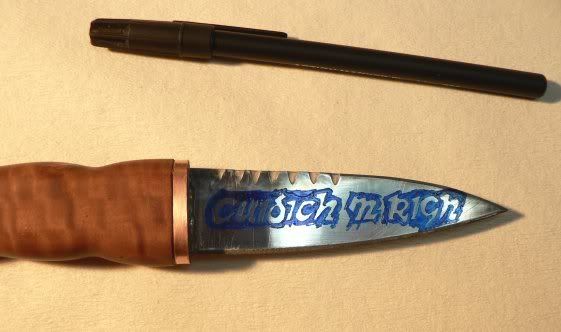
In this project I used candle wax as well, as I like to have a bit of a wall to contain the acids. If candle wax is used for a resist on it's own, the design has to be scribed through the wax with a scriber, or knife, etc. Observant kilt-makers will notice the startling similarity between my scriber & a thread unpicker. I found mine in my wife's sewing box, but it had a slight accident with a pair of snips & a file, & now it lives in my workshop  If I used wax alone, I'd personally melt it in a container, & apply it with a brush or cloth for ease of scribing. If I used wax alone, I'd personally melt it in a container, & apply it with a brush or cloth for ease of scribing. 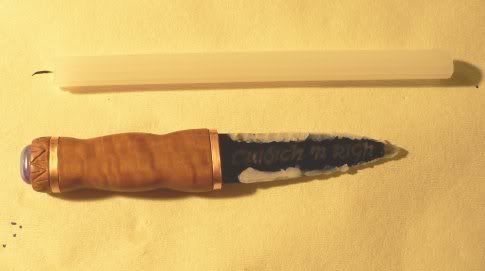
If I remember any of my lessons from the navy correctly, Shellac also makes a good resist, & can be easily brushed over the bigger areas
-
-
Here's the wax over the larger sections, & also serving as a kind of dam wall. Unless you are repeating the same pattern on both sides, I'd suggest repeating the wax over the edges on the reverse side, to stop any acid from leaking through & running down the underside.
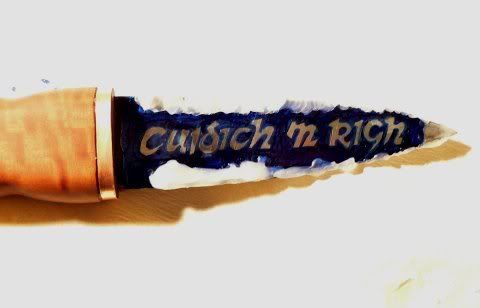
I've also gone back over the lettering with the scriber to clean it up a bit. If you can, check the resist job with a magnifying glass, as any small holes left in the covering will end up as spots on the finished blade. When these are all touched up, paint on the etching solution with a brush, making sure that each section gets fully covered. Go & have a coffee & put your feet up: it takes at least an hour for the acid to do it's job.
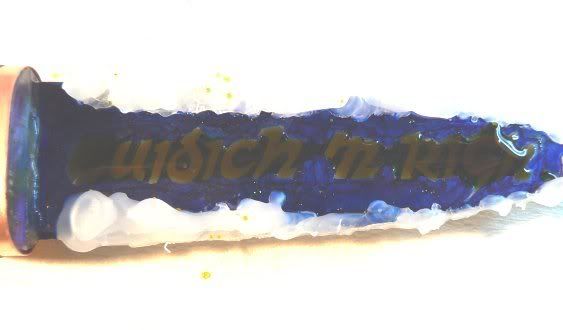
After the hour, check the progress, & if you're satisfied, thoroughly rinse the solution off. For a darker, deeper finish leave the solution in place for a longer period before rinsing.The blue resist ink is easily removed with white spirits. Rub the blade down with beeswax to stop the reaction, & there you have it: a new patterned blade! I'll have the pics of the finished blade up very soon.
-
-
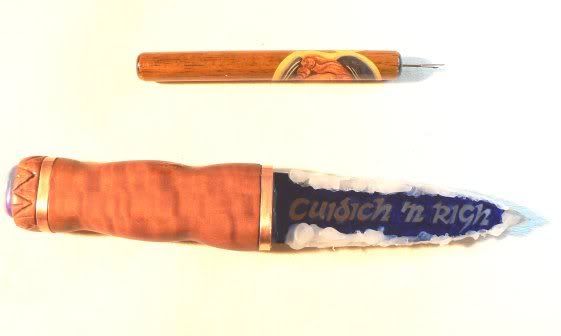
Here we go: a couple of pics of the finished etch under varying light conditions. This one turned out quite well, with only a couple of bleeds under the etch.

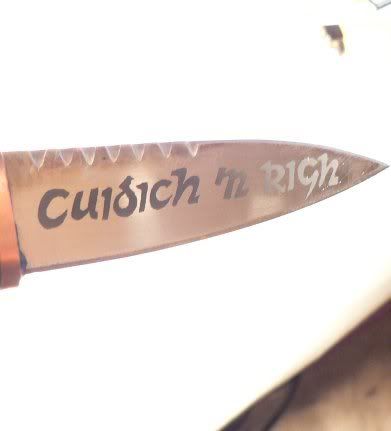
Although the motto was noticably harder to get neat than the other stuff I've tried, it's still a remarkably simple project, & far harder to write about than it is to achieve. The improvement it has made to a pretty plain blade is incredible, & the pen & acid only came to around $30AU, with enough left over to last me years 
-
-
Very nice Raptor! I was toying with how to do this a few months back. Thanks for doing my homework for me  You do great work! You do great work!
-
Similar Threads
-
By Riverkilt in forum Miscellaneous Forum
Replies: 25
Last Post: 21st July 06, 06:24 PM
-
By yoippari in forum Miscellaneous Forum
Replies: 7
Last Post: 30th December 05, 08:17 AM
-
By Kid Cossack in forum Contemporary Kilt Wear
Replies: 9
Last Post: 2nd June 05, 10:27 PM
 Posting Permissions
- You may not post new threads
- You may not post replies
- You may not post attachments
- You may not edit your posts
-
Forum Rules
|
|


Bookmarks