X Marks the Scot - An on-line community of kilt wearers.
|
-
15th January 11, 05:43 AM
#6
I love that video, but he works so fast (and they edit a lot) that it's hard to get more than a general impression of certain steps.
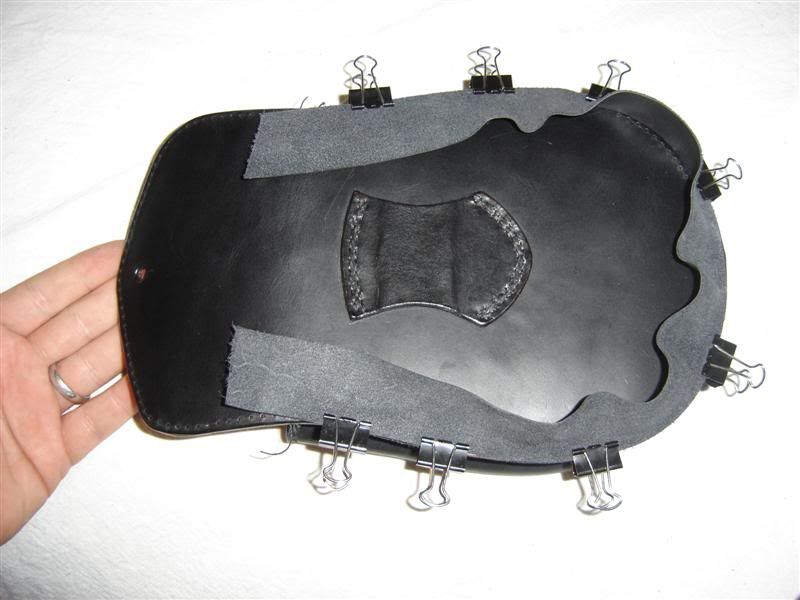
I'll break it down in text and pix. I used the rolled edge of the BACK of this sporran, but exactly the same techniques apply to the flap (which I burnished on this particular piece).
The rolled edge on the flap of the sporran pictured isn't too hard to accomplish, but does take a steady hand to do well- as you can see if you look at low quality pieces. I won't post any pix of the cheap ones, but they're not hard to find.
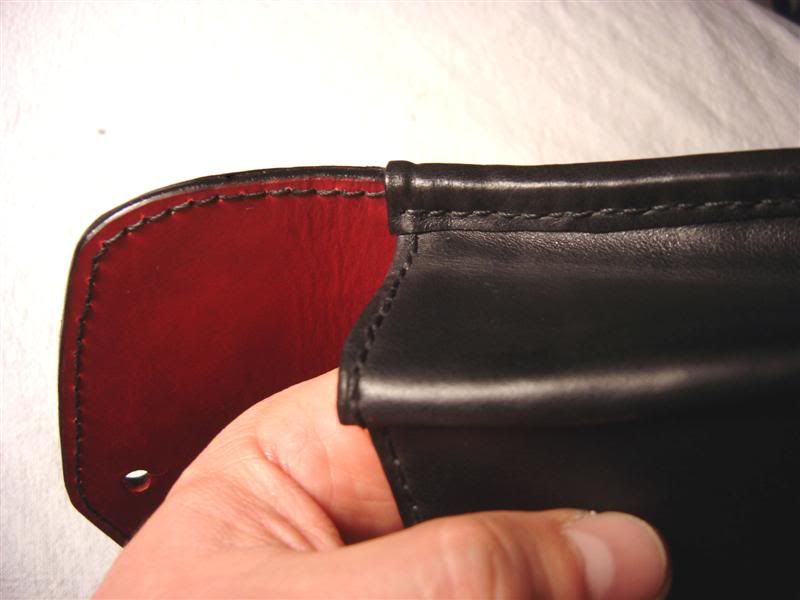
You start with the trim piece (about 1" wide) finished side down toward the finished side of the flap, just like a normal seam that you'd invert later. Pictured below.
Next, you stitch the two pieces (trim and edge) together. Making this line of stitches straight is VERY important, as this line, while physically hidden, is the one that shapes the inner edge of the 'roll'.
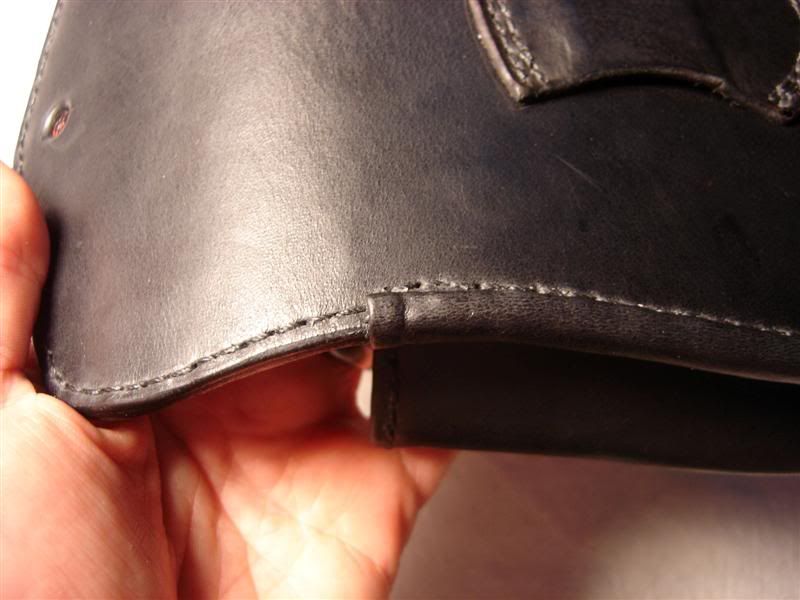
The trim is then pulled back over itself, covering the line of stitches you just made, and wrapped over the edge. As pictured below.

NEXT, you go in right along the edge of the newly formed 'roll' (on the top-side of the flap) and sew ANOTHER line of stitches right against the edge of the roll. This line holds the underside of the roll in place.
This is where LOTS of companies fail, IMO (L&M isn't one of them though  ). Because of the nature of sewing against the roll, lots of companies sew that stitch line too far into the face, and do a lousy job of it as well. Hand sewing this line allows you to get right up next to the roll and do a nice even job of finishing. ). Because of the nature of sewing against the roll, lots of companies sew that stitch line too far into the face, and do a lousy job of it as well. Hand sewing this line allows you to get right up next to the roll and do a nice even job of finishing.
Detail of the outside (finished edge) of the roll
Then, you can go back in with a razor and cut the underside of the trim even to follow the edge of the stitch line you JUST made.
And voila! A rolled edge!

I hope that helps. If you need any more guidance, don't hesitate to ask.
And post pix of your finished pieces!
 ith: ith:
Last edited by artificer; 15th January 11 at 08:47 AM.
-
Similar Threads
-
By wvpiper in forum Kilt Advice
Replies: 17
Last Post: 13th June 09, 07:44 PM
-
By Bart_In_A_Kilt in forum DIY Showroom
Replies: 14
Last Post: 9th March 09, 10:17 AM
-
By Larry124 in forum Kilt Advice
Replies: 27
Last Post: 30th December 08, 02:54 PM
-
By MacDhunadh in forum General Kilt Talk
Replies: 8
Last Post: 7th December 07, 03:04 AM
-
By cavscout in forum How to Accessorize your Kilt
Replies: 4
Last Post: 12th August 05, 04:56 AM
 Posting Permissions
- You may not post new threads
- You may not post replies
- You may not post attachments
- You may not edit your posts
-
Forum Rules
|
|


Bookmarks