|
-
24th October 23, 12:27 PM
#1
I'm not sure that I would agree that the methods presented in "The Art of Kiltmaking", or TAoK for short, cannot be applied to repairs.
I have made many kilts from scratch and repaired many kilts. I use the same techniques and the same 4 stitches for both.
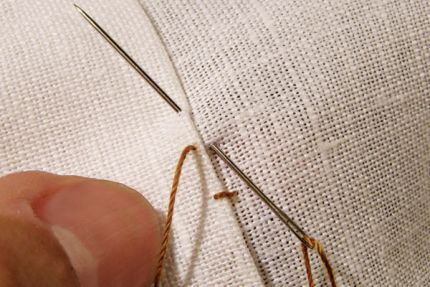
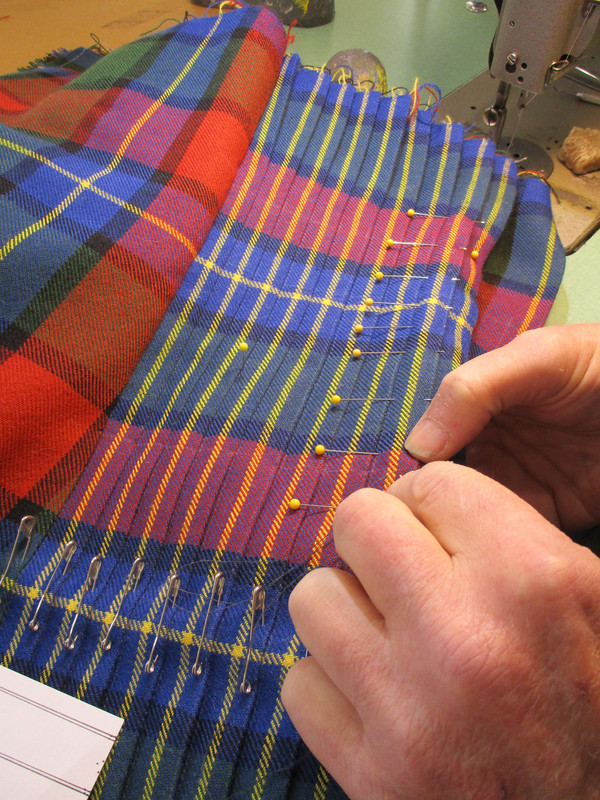
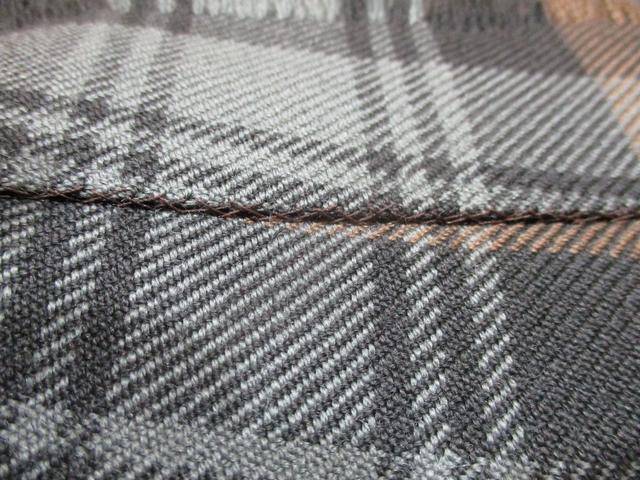
When stitching pleats by hand I do not push the needle into the fabric perpendicular to the edge of the pleat. I push the needle into the pleat perpendicular to where the thread from the last stitch came out of the fabric. The needle then passes through the fabric at an angle.
This does two things. The angle of the needle sets the size or length of the stitches and allow me to adjust and maintain the alignment of the Tartan elements.

This is called a Fell Stitch.
Last edited by Steve Ashton; 24th October 23 at 12:30 PM.
-
-
24th October 23, 12:34 PM
#2
Now, I am predominantly Left-Handed so I do things a little differently than Barb does. I do not keep the kilt in my lap with the un-stitched fabric away from my body. I reverse this with the kilt laid on a table in front of me and the un-stitched fabric towards my body.
It is not the stitching of the pleats that give the strength to the kilt.
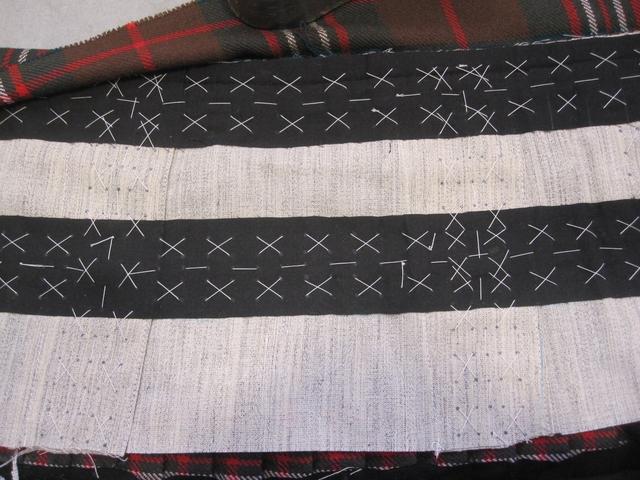
The internal interfacing and stabilizer are what give all the strength to the Garment.
The interfacing and stabilizer are stitched into the inside of the kilt using a pad stitch.
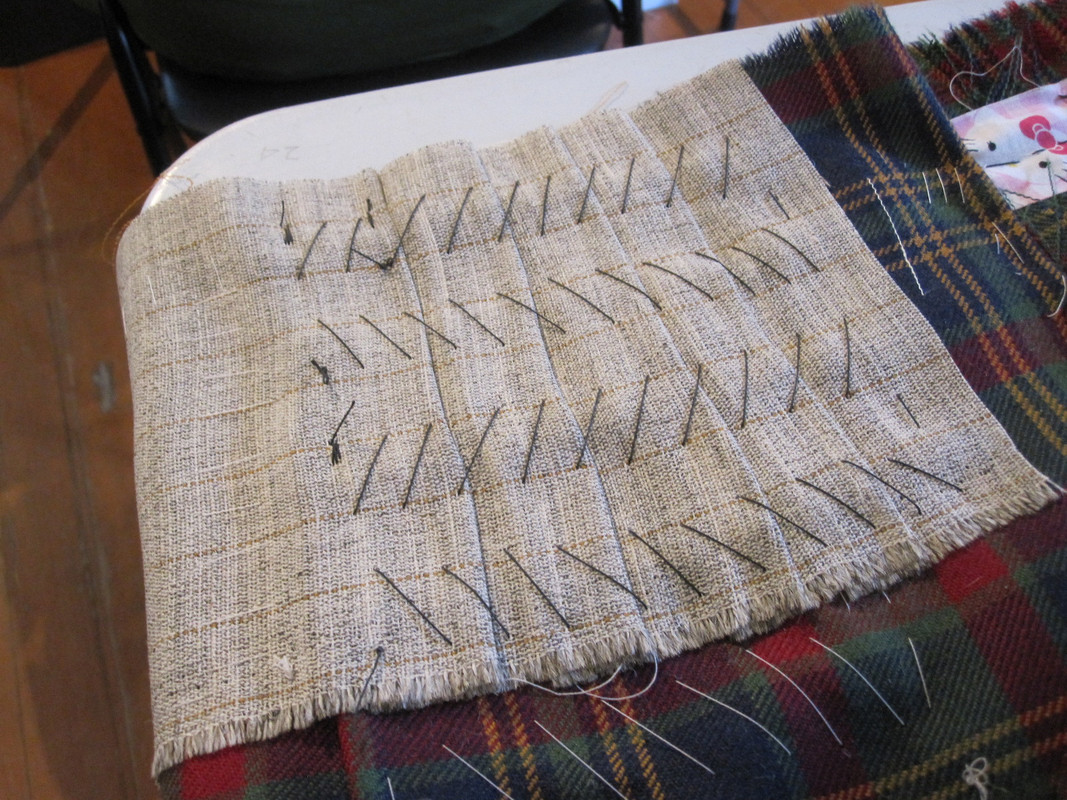
The pleat stitching does not go through the interfacing and the interfacing stitching does not go through to the outside of the kilt.
Last edited by Steve Ashton; 24th October 23 at 12:38 PM.
-
-
24th October 23, 12:45 PM
#3
I then do one other thing differently than Barb. I machine stitch my interfacing and stabilizer into one unified piece.
Then pad stitch that one piece into the kilt.
My interfacing and stabilizer also extend the entire width of the inside of the kilt.
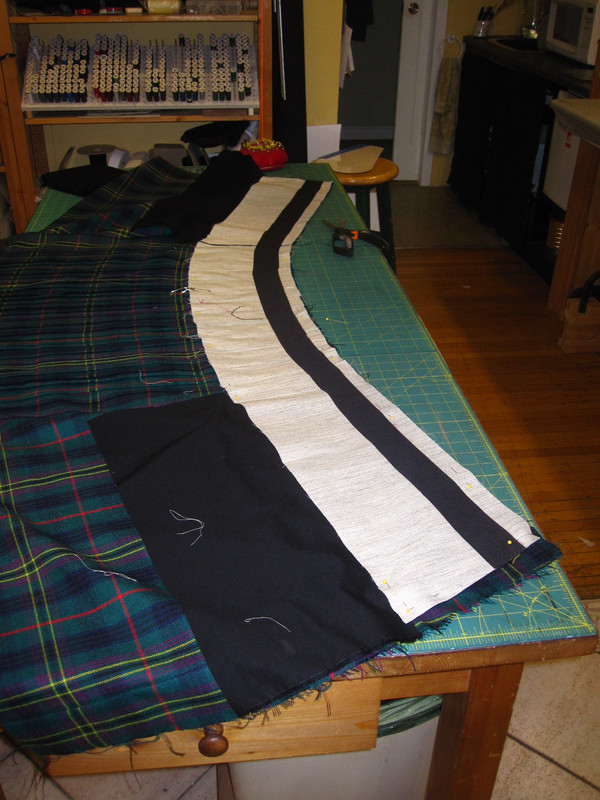
But both methods work equally well.
-
-
24th October 23, 12:57 PM
#4
I use the same 100% Polyester Gutterman brand thread that Barb uses. It is thin so hides well is very strong and is available in a huge range of colors.
I have seen kilts sewn with a thicker thread. I have seen kilts sewn with Cotton thread. I have seen kilts sewn with Silimide thread. I have tried Silimide thread and it works very well but is not available in a wide enough color range for many Tartans and is much more expensive.
For my internal pad stitching I use Coats and Clark brand extra strong upholstery thread.
I do not use thick thread for pleat stitching and never use cotton thread for kilts.
-
-
24th October 23, 01:04 PM
#5
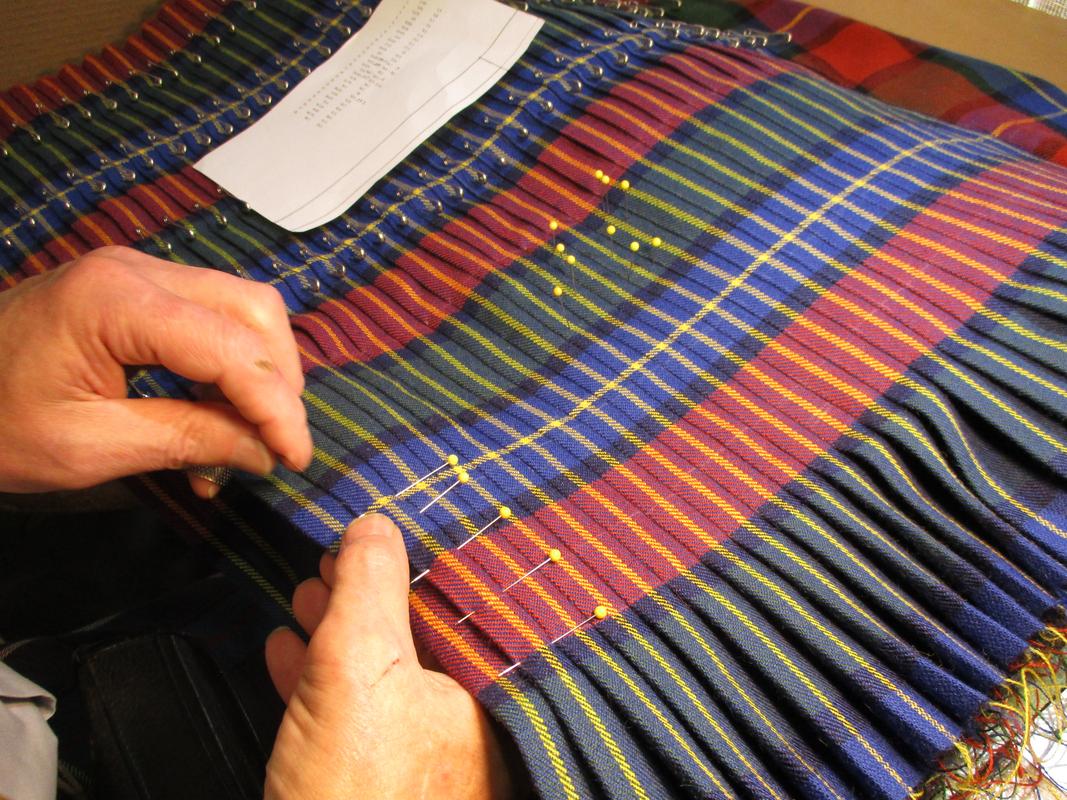
When stitching pleats - due to the way I support the weight of the kilt on a table in front of me because I stitch left-handed - I always stitch in the direction from the hips to the waist. This allows me to control the tension on the fabric with my right hand and the needle in my left.
I also press my pleats before sewing and use pins as I work.
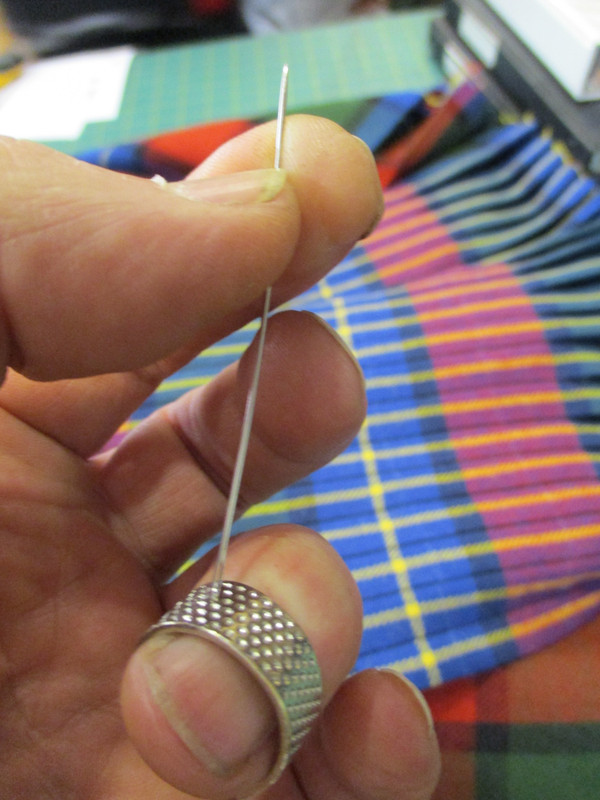
Barb likes a leather thimble. I prefer a British style ring thimble and learned to hold my needle like a British Tailor.
Last edited by Steve Ashton; 24th October 23 at 01:05 PM.
-
The Following User Says 'Aye' to Steve Ashton For This Useful Post:
-
24th October 23, 01:09 PM
#6
I've never been able to work with a thimble, but may have to give the ring thimble a try. Never seen one before! I have a huge callous on the side of my middle finger that acts as my thimble, lol.
-
-
24th October 23, 01:11 PM
#7
I use a total of only four stitches to make a kilt.
The Fell Stitch as described earlier.
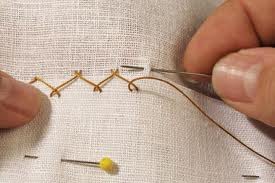
The Pad Stitch also described earlier.
The Catch Stitch to sew up the small corners of the aprons at the selvedge, the inside of the apron facings etc.
The Pick Stitch for apron facings, liner and anywhere else I don't want stitches to show on the outside of the kilt.
Last edited by Steve Ashton; 24th October 23 at 01:25 PM.
-
-
24th October 23, 01:47 PM
#8
When hand-stitching a kilt I am not inventing anything new. I use the same techniques, methods and materials as a Saville Row Tailor. Just not as skillfully.
There are very few places where kiltmaking and making a man's tailored suit vary. In a kilt there is a line of stitches to support the weight of the pleats where they are cut away and would sag by gravity if not supported.
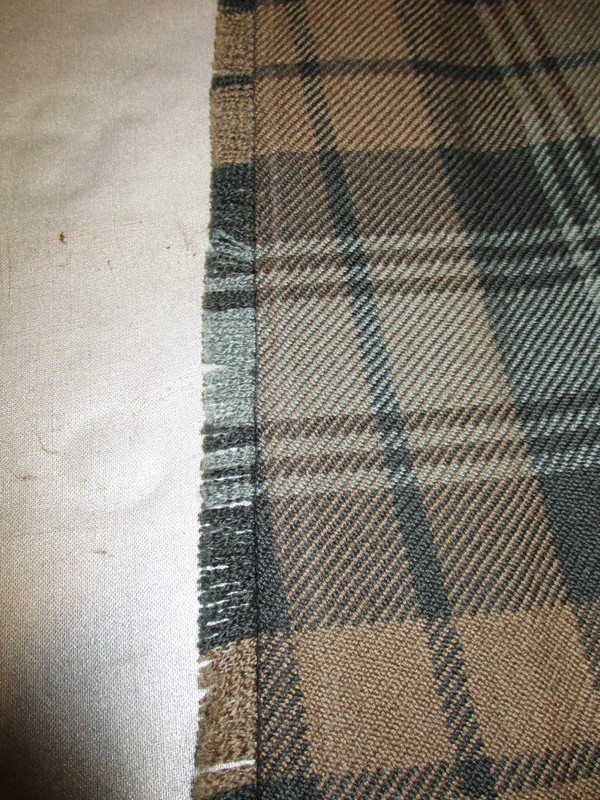
When making a kilt there is no paper pattern or cut out pieces that are seamed together. In fact, right up to the point where the inside of the pleats are cut-away to prevent bulk in the back of the Fell, the entire kilt can be un-stitched and will be a long, single length of fabric again.
Things like interfacing which give stability, body, and prevent drooping are the same. Only when stitching the straps and buckles do I stitch all the way through the outer Tartan fabric and interfacing to anchor the straps and buckles to the stabilizer with strong upolstery thread.
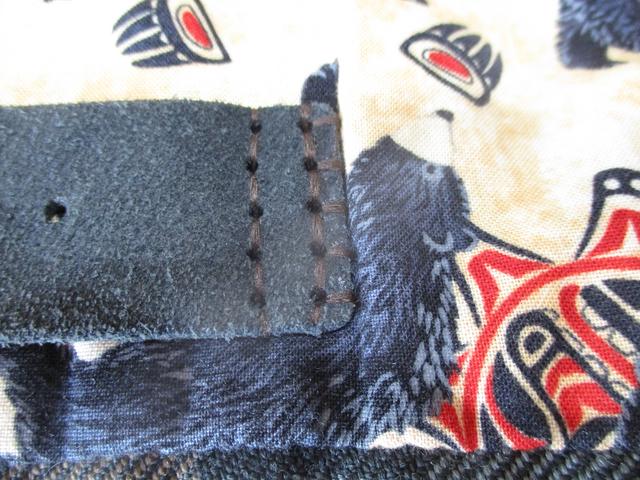
The liner on the inside of the kilt is only there to hide the internal strengthening elements. It is usually made from a cotton boadcloth and can be replaced if needed without needing to disassemble the kilt. the liner should be fully sewn on all the edges. There should be nothing to catch or snag inside the kilt.
In fact, one of the dead give-aways that a kilt is not made to be of heritage quality is when you can lift the liner, find any interfacing sewn to just the liner, an and the pleat cut-aways allowed to fray.

-
-
24th October 23, 01:04 PM
#9
 Originally Posted by Steve Ashton

I'm not sure that I would agree that the methods presented in "The Art of Kiltmaking", or TAoK for short, cannot be applied to repairs.
I have made many kilts from scratch and repaired many kilts. I use the same techniques and the same 4 stitches for both.
When stitching pleats by hand I do not push the needle into the fabric perpendicular to the edge of the pleat. I push the needle into the pleat perpendicular to where the thread from the last stitch came out of the fabric. The needle then passes through the fabric at an angle.
This does two things. The angle of the needle sets the size or length of the stitches and allow me to adjust and maintain the alignment of the Tartan elements.
This is called a Fell Stitch.
Does it not matter that the fell stitch is only catching two layers of fabric - those visible in your first photo - since the stitches aren't, or shouldn't be, under tension? I don't seem to be able to catch the bottom (unseen) layer without taking a stitch that is 3/16" or more. The idea in the post above yours of using a curved suture needle is interesting, though having never sewn with one it would probably be too weird to me.
-
-
24th October 23, 05:08 PM
#10
Originally Posted by Naught
Does it not matter that the fell stitch is only catching two layers of fabric - those visible in your first photo - since the stitches aren't, or shouldn't be, under tension? I don't seem to be able to catch the bottom (unseen) layer without taking a stitch that is 3/16" or more. The idea in the post above yours of using a curved suture needle is interesting, though having never sewn with one it would probably be too weird to me.
The second or bottom layer of fabric does not need to be caught by the Fell stitching. You need that second layer to sort of float inside the kilt. That is the part that you cut-away inside.

-
The Following User Says 'Aye' to Steve Ashton For This Useful Post:
 Posting Permissions
- You may not post new threads
- You may not post replies
- You may not post attachments
- You may not edit your posts
-
Forum Rules
|
|


Bookmarks