|
-
15th September 10, 02:03 PM
#1
Sporran #12 - Day Sporran with a 'Twist' WIP
I'd like to start with a bit of background before I dive into the technical details of this one.
A few months back I had sent a message to our own Ryan Ross about custom yarn colours for the amazing bonnets he hand knits, seen HERE. I'm not one of nature's "hat-guys", but his work has intrigued me from the start, and the more of them I saw, the more I knew I would have to have one.
In our conversations Ryan mentioned that he'd be interested in a trade, and the process of sporran design soon started.
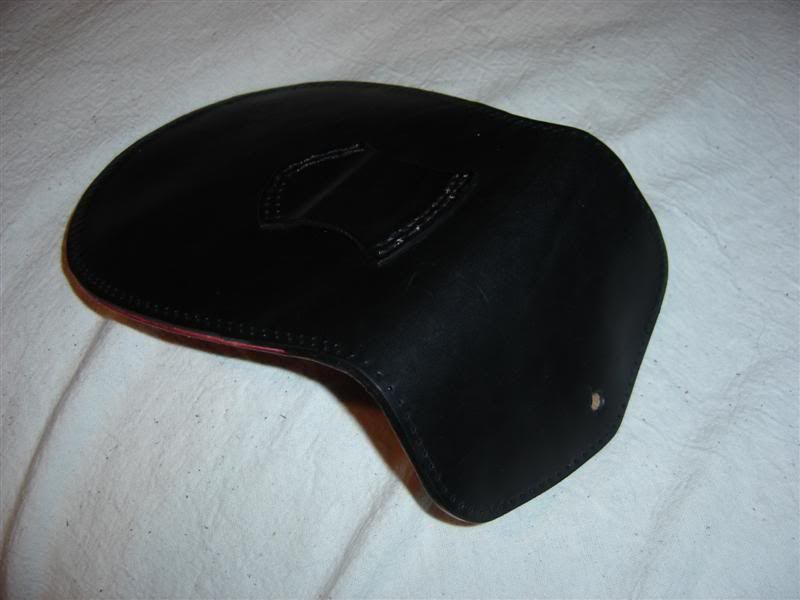
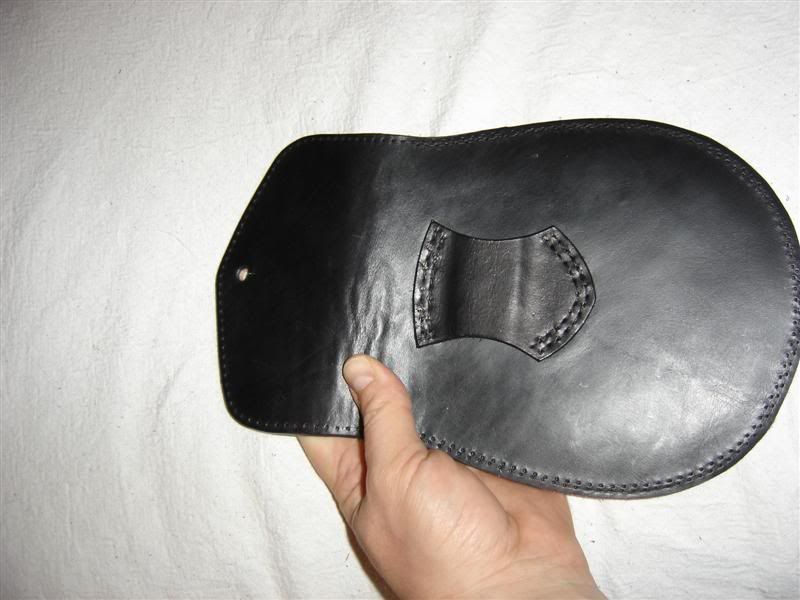
He wanted a very basic black 'regimental' style sporran, with a plain top flap with a Sam Browne stud closure. I wanted to see just how far I could push the 'plain' envelope.
I thought "if we are going plain, why not go PLAIN?!" The edge of the flap and bag front was to be burnished rather than have a fold over trim piece. I was wondering if I could actually make the bag with NO visible trim edge of leather showing for the gusset.
This means that the bag gets assembled fully while inside-out, then turned right side out and the gusset is stitched through blind to attach it to inside face of the rear panel.
I'll be the first to say that it's going to be difficult, and may not work...
We'll have to see if I sew myself into a corner and have to tear the bag back down to the start (or start over).
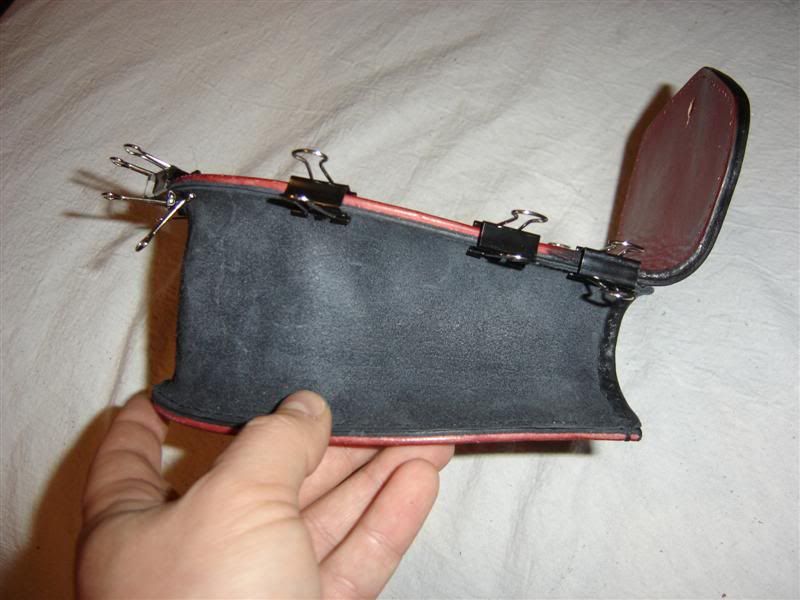
We start with the veg tanned interior panels, dyed red, oiled, waxed and hand burnished. Ryan liked the red look from #11 seen HERE, but suede wasn't an option, as it doesn't burnish.
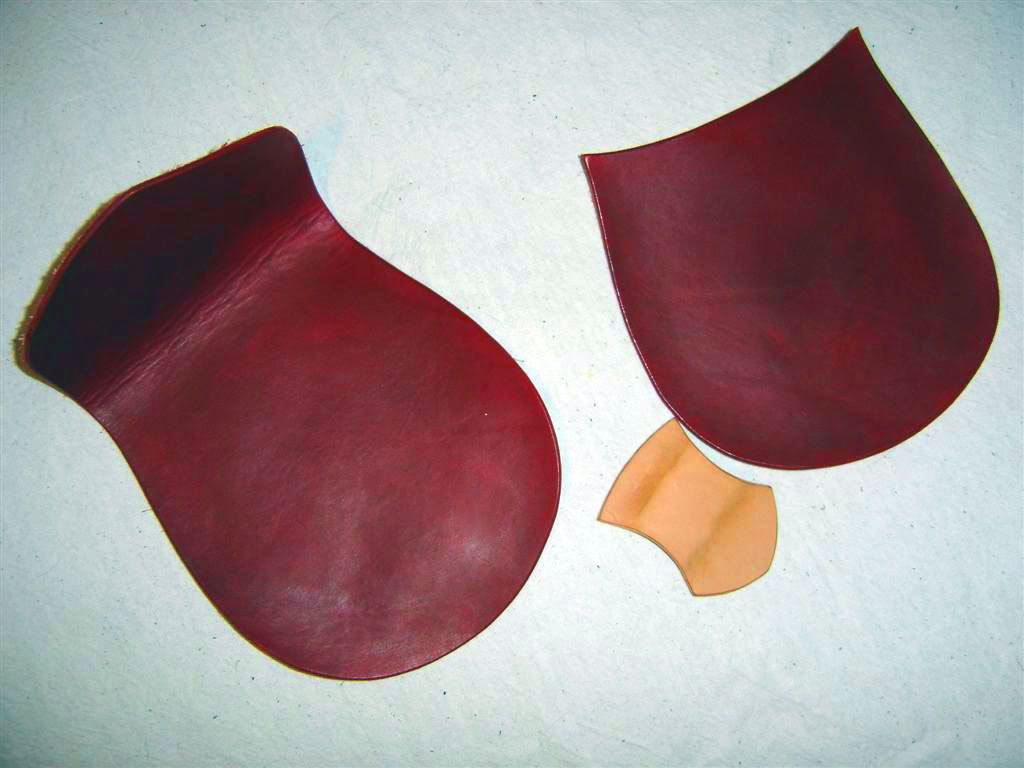
Ryan wanted a nice smooth, not too glossy leather for the exterior. I managed to get some that was similar to the brown used in #5-10. It isn't as lush, which is good. A pull-up leather in black can get very ashy and grey in a hurry.
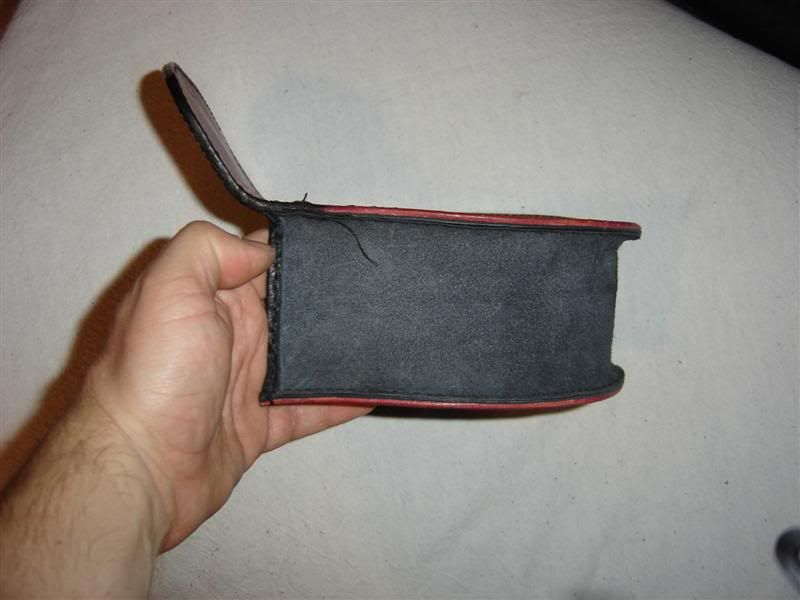
After the interior panels were glued to the outer leather, I burnished the edges with canvas and wax until they were smoooooth, and nearly one-piece.
Everything is then edge-dyed for uniformity.
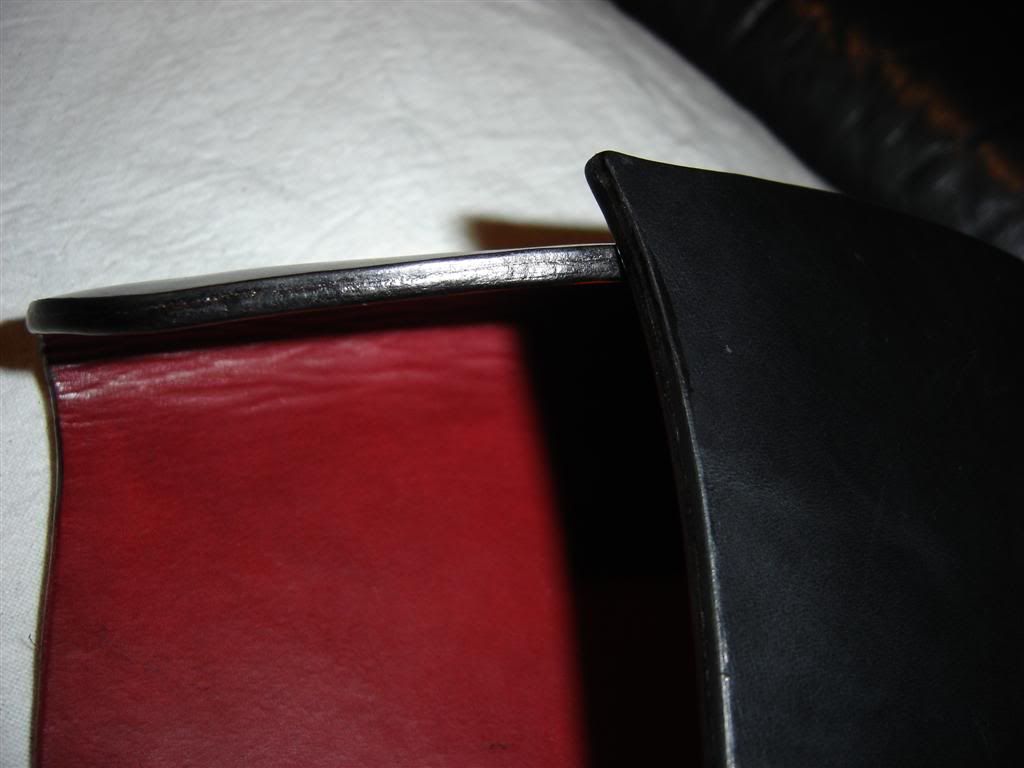
The gusset is then attached to the front face, with the top edges 'hemmed'. I really don't like the raw edge of leather to show on the gusset. I know lots of people don't mind (or even notice) but it always strikes me as unfinished.
The bag front, prior to attaching to the rear panel.
Sorry for the blurry shot, but you can see how large the gusset is right now. It needs to be as it will be turned over itself 3 times and wrapped around the rear panel's edge then stitched- assuming I can make this work
With a bit of luck I'll start the rear assembly this evening.
 ith: ith:
-
-
15th September 10, 04:14 PM
#2
Almost a burgundy or ox-blood red. I like that!
"When I wear my Kilt, God looks down with pride and the Devil looks up with envy." --Unknown
Proud Chief of Clan Bacon. You know you want some!
-
-
15th September 10, 04:20 PM
#3
Here you go again Artificer, creating another masterpiece and making all us sinners jealous  Your attention to detail, such as the hidden stitching is amazing. Your attention to detail, such as the hidden stitching is amazing.
-
-
16th September 10, 06:47 PM
#4
Thanks Guys,
Here's progress.
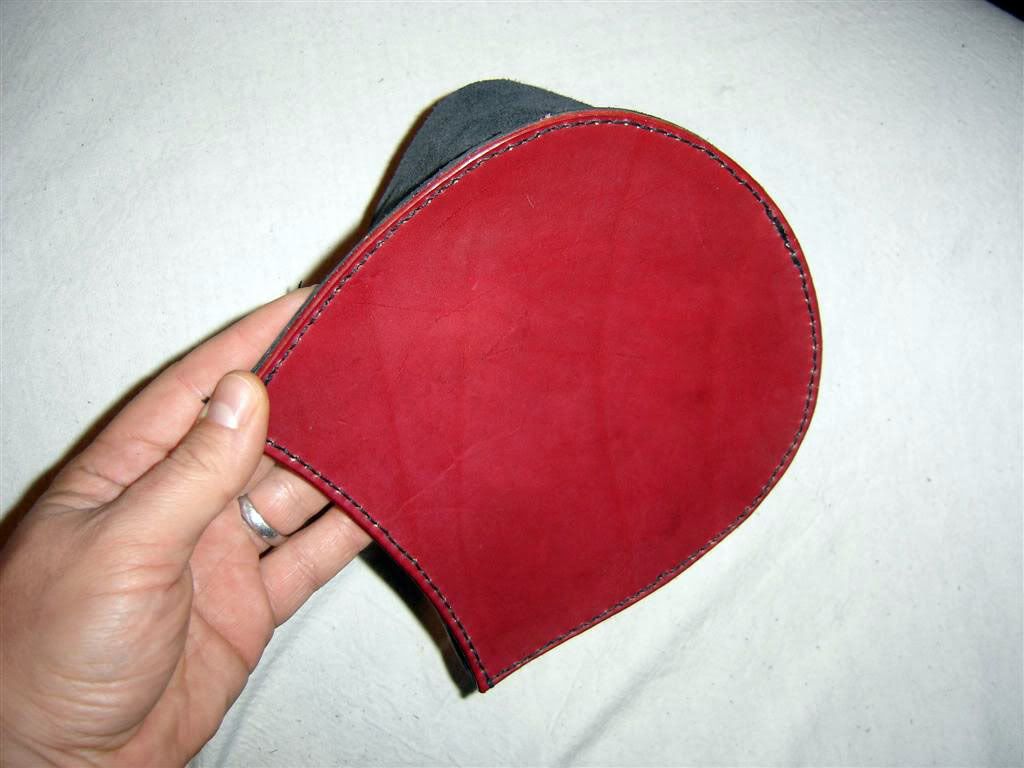
Rear panel and flap ready for stitching
Strap keeper sewn in place
Gusset clipped to rear panel for sewing
Sewn!
The big question is, CAN I pull the thing inside out? It's time to see if I can invert the bag and finish the stitch, or I this all ends up as wasted time and material and I have to start over...
Stay tuned.
-
-
16th September 10, 07:22 PM
#5
Good luck on the inside outing, better you doing it than me
-
-
16th September 10, 07:29 PM
#6
Oh the suspense! Can't wait for the next installment!
"Before two notes of the theme were played, Colin knew it was Patrick Mor MacCrimmon's 'Lament for the Children'...Sad seven times--ah, Patrick MacCrimmon of the seven dead sons....'It's a hard tune, that', said old Angus. Hard on the piper; hard on them all; hard on the world." Butcher's Broom, by Neil Gunn, 1994 Walker & Co, NY, p. 397-8.
-
-
16th September 10, 07:30 PM
#7
Very nice job!
Re your question;.."can I pull this thing inside out?"
I am at precisely this point, with one constructed in this manner!...but mine is only made from a worn out leg-of mutton gun case! Half hours stitching, and we will see!
-
-
17th September 10, 07:35 AM
#8
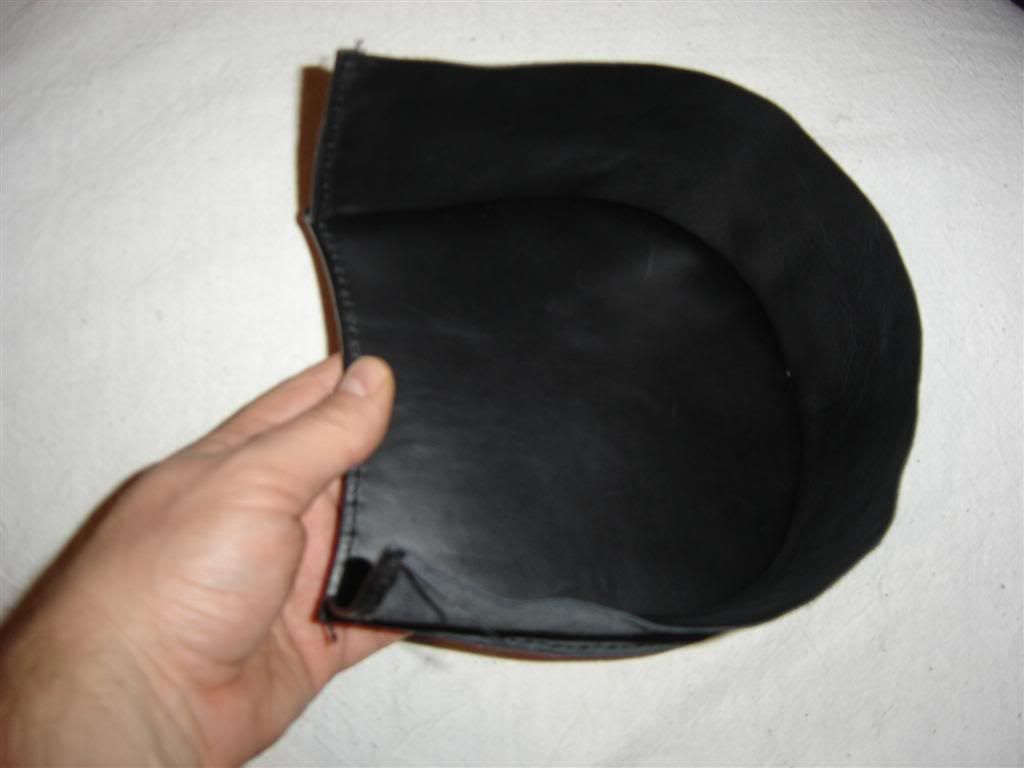
A Stitch Too Far!
Everything was a go. One line of stitches to complete and the sporran would be finished.
All that was left was the inversion...
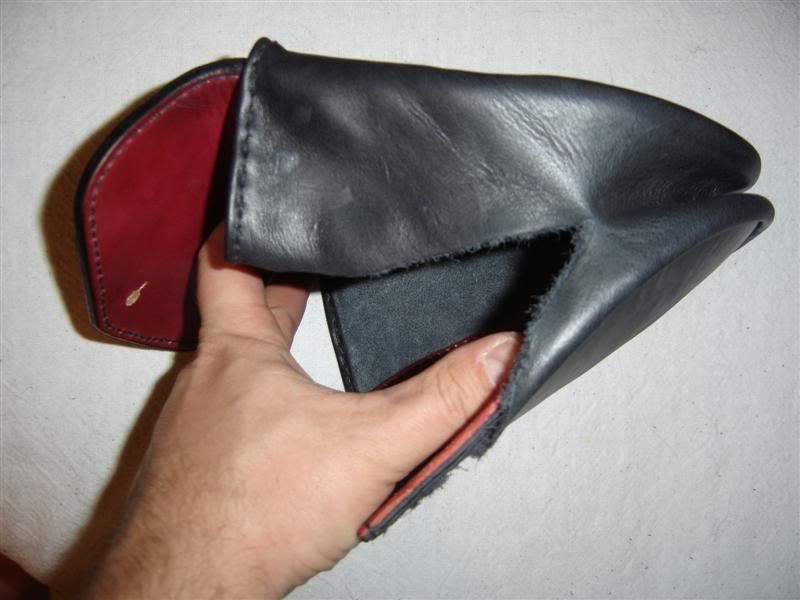
DISASTER!
I was about 85% through the process of turning it right side out when I heard the rip.  I thought I was home and dry. I thought I was home and dry.
Oh well. I guess this is the down side to 'Qui audet adipiscitur'. Sometimes when we dare, we lose.
I knew it was a long shot to attempt a gusset like that, but it would have been cool if it had worked.
I've informed Ryan of the "slight setback" and will now remake the whole sporran from scratch. It would take WAY more time to attempt to salvage anything than it would to simply start over.
THIS time, I'll use a slightly more orthodox gusset attachment.
ith:
-
-
17th September 10, 07:55 AM
#9
Yikes. I can only imagine the horror you felt when it ripped. All that work that now has to be redone. Been there, done that. It ain't a good feeling.
The work looks excellent thus far, though. I have to tip my hat to your craftsmanship!
I wonder if you could use a more stretchy material for the gusset that would still look pretty close to what you had intended. I know there are some materials out there that look like leather but stretch generously. They tend to be thin, but could be doubled or tripled in layers to provide enough stiffness for functionality while still being stretchy enough for the inversion process.
-
-
17th September 10, 09:06 AM
#10
Man, that's a heartbreaker! Beautiful sporran nonetheless. Looking forward to seeing #12.1.
-
Similar Threads
-
By bricelythgoe in forum DIY Showroom
Replies: 25
Last Post: 2nd December 09, 04:24 AM
-
By Bart_In_A_Kilt in forum DIY Showroom
Replies: 14
Last Post: 9th March 09, 10:17 AM
-
By Ancienne Alliance in forum Kilt Advice
Replies: 36
Last Post: 7th December 08, 11:16 AM
-
By Giraffe in forum Kilt Advice
Replies: 56
Last Post: 27th March 08, 07:39 PM
-
By phil h in forum How to Accessorize your Kilt
Replies: 16
Last Post: 12th December 04, 10:51 AM
 Posting Permissions
- You may not post new threads
- You may not post replies
- You may not post attachments
- You may not edit your posts
-
Forum Rules
|
|


Bookmarks