Semi-DIY: finishing a kilt for Bob
So long ago that the For Sale thread has disappeared, I purchased a hand-sewn MacDonald of the Isles "kilt" from another member. I put the word in quotation marks because he had simply pleated the fabric, put on a waistband, buckles and straps, and worn the resulting garment. His ad said it "needed a liner." Obviously it needed much more than that, but he hadn't cut out the pleats so at worst I figured I was getting a nice length of lovely fabric for the price.
I was very pleased to find that his handwork was well-done and the kilt did fit Bob nicely. But the buckles were already distorting the unsupported fabric, so I proceeded with my plan to rebuild/finish the kilt per The Art of Kiltmaking.
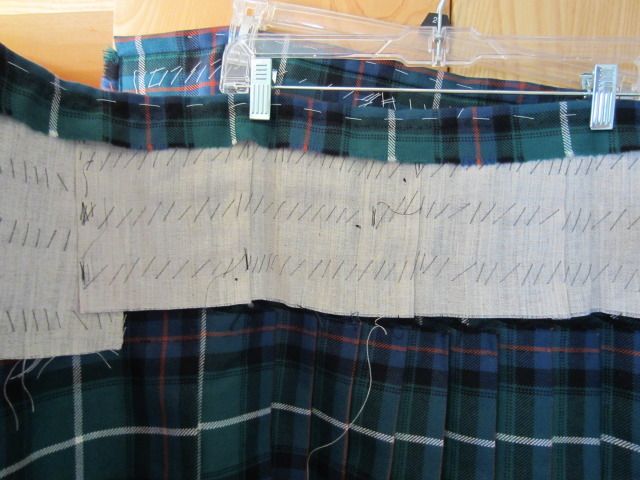
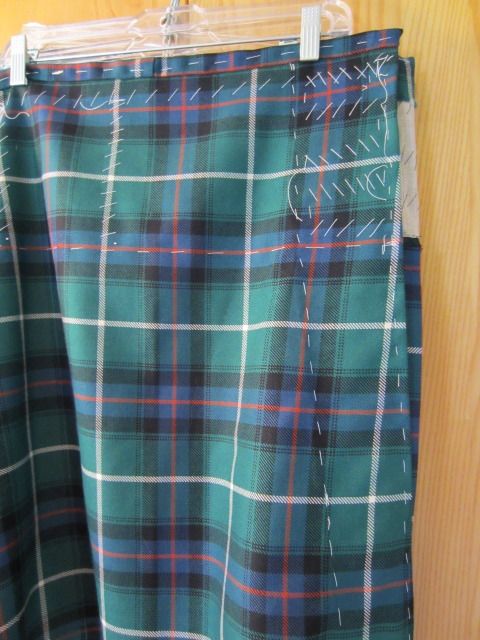
"All" (there are those pesky q-marks again!) I had to do was. . . deep breath. . . remove buckles and straps, remove waistband, partially open inner and outer apron facings, cut away pleats, sew in stabilizer, sew in hair canvas, steek the pleats, close up the facings, sew on the waistband, install buckles and straps (converting the left-hand set to an inner closure, a la Mr. Newsome), and finally put in that "all it needs is a" liner!
Here are just a few snaps to show that I did the work:
The kilt made its debut at the Costa Mesa Games a few weeks back:
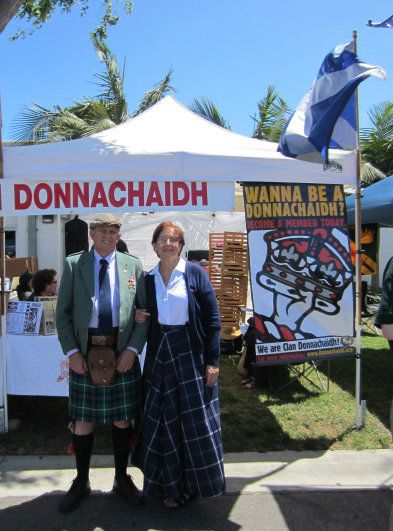
It looks wonderful with his new-to-us green tweed day jacket and a tattersall shirt. In fact, a fellow stopped us in our rambles and asked if he could use Bob's outfit to give his twenty-something son some pointers on Highland daywear! 
Bob was fortunate enough to know my father (way back when), work together on British sports cars and share his prized San Miguel beer. He's honored to wear the MacDonald tartan in Daddy's memory.
Proudly Duncan [maternal], MacDonald and MacDaniel [paternal].


Bookmarks